Bulk import is available across all management systems (ORM, AML, ISMS, Compliance, Audits), allowing you to upload and link hundreds of records including processes, risks, causes and consequences, controls, action plans, events, standards, and risk factors using the CSV (UTF-8) format.
→ Please note that this feature is available starting from the Starter plan.
How to Import Records in Bulk
Go to the System Settings module (gear icon).
Select the ORM option or the prefix of the management system you are working in (ORM, ISMS, AML, COMP, AUD).
Navigate to the Bulk Import section.

In this section, you will find the bulk import option for the system’s entities.
What Are the File Requirements for Bulk Upload?
To upload records in bulk, you must take into account the following requirements indicated by the tool when you access the import section. These elements are mandatory to ensure the successful upload of event records:
- If you plan to upload fields that do not currently exist in the system, we recommend creating them first.
- The file must be flat—no charts, shapes, or images.
- The number of columns must be equal to or greater than the number of mandatory fields.
- There must be no duplicate column headers in the file.
- The file format must be .csv (UTF-8), using a semicolon (;) as the column separator. Avoid using this character within your text fields.
- Column headers must begin in the first row of the file.
- The base entity must include a column named referenceCode, which allows associations between entities. Each value must be unique.
- The date and time format must follow yyyy-mm-ddThh:mm:ss, with both date and time combined into a single column.
- If you're including associated entities, each must have a column named codeParentReference, which allows the system to create the corresponding linked record.
⚠️ Be sure to check the maximum number of records you’re allowed to upload according to your plan.
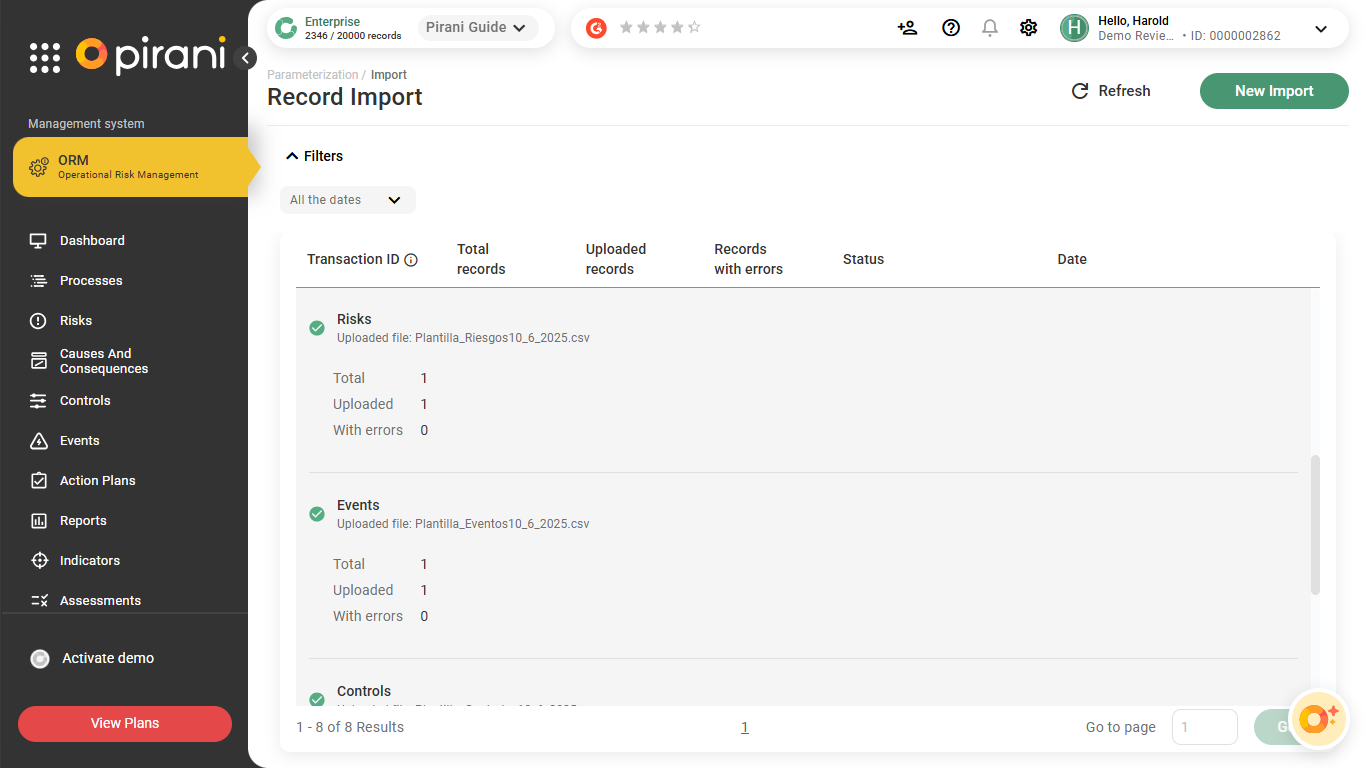
How to View the History
In this section, you can access the history of bulk uploads performed in the system. You can apply date range filters to review previous imports based on the period of interest.
-2.png?width=602&height=338&name=image%20(1)-2.png)
How to Upload or Update the File for Import
Click on New Import. The system will present two options based on the type of upload:
-1.png?width=602&height=335&name=image%20(7)-1.png)
1. Single Entity
Allows you to import or update records for a single system entity (for example: risks, controls, events, etc.).
-2.png?width=602&height=335&name=image%20(3)-2.png)
Steps for Uploading:
- Select the entity you want to upload data to.
- Choose whether you want to create new records or update existing ones.
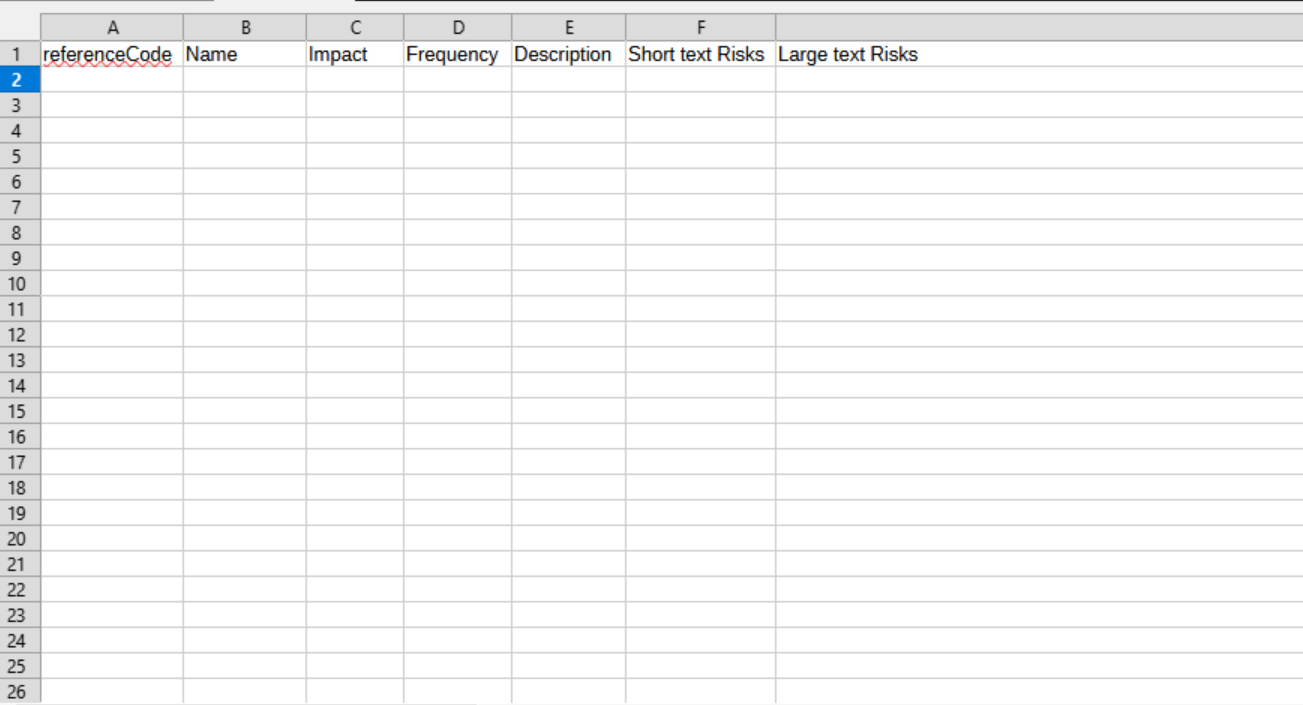
- Download the template and fill in the required information, or upload your own file in .csv format.
- Make sure the referenceCode field is present and correctly filled out, as it is the primary identifier used to create or update the record in the system.
-1.png?width=688&height=389&name=image%20(4)-1.png)
Note: If you have any doubts about how your data should be organized, or which fields and columns are required, you can download the template available at the bottom of the box.
Once your file meets all the conditions mentioned above, you can upload or drag and drop the file into the box with the cloud and upward arrow icon.
Next:
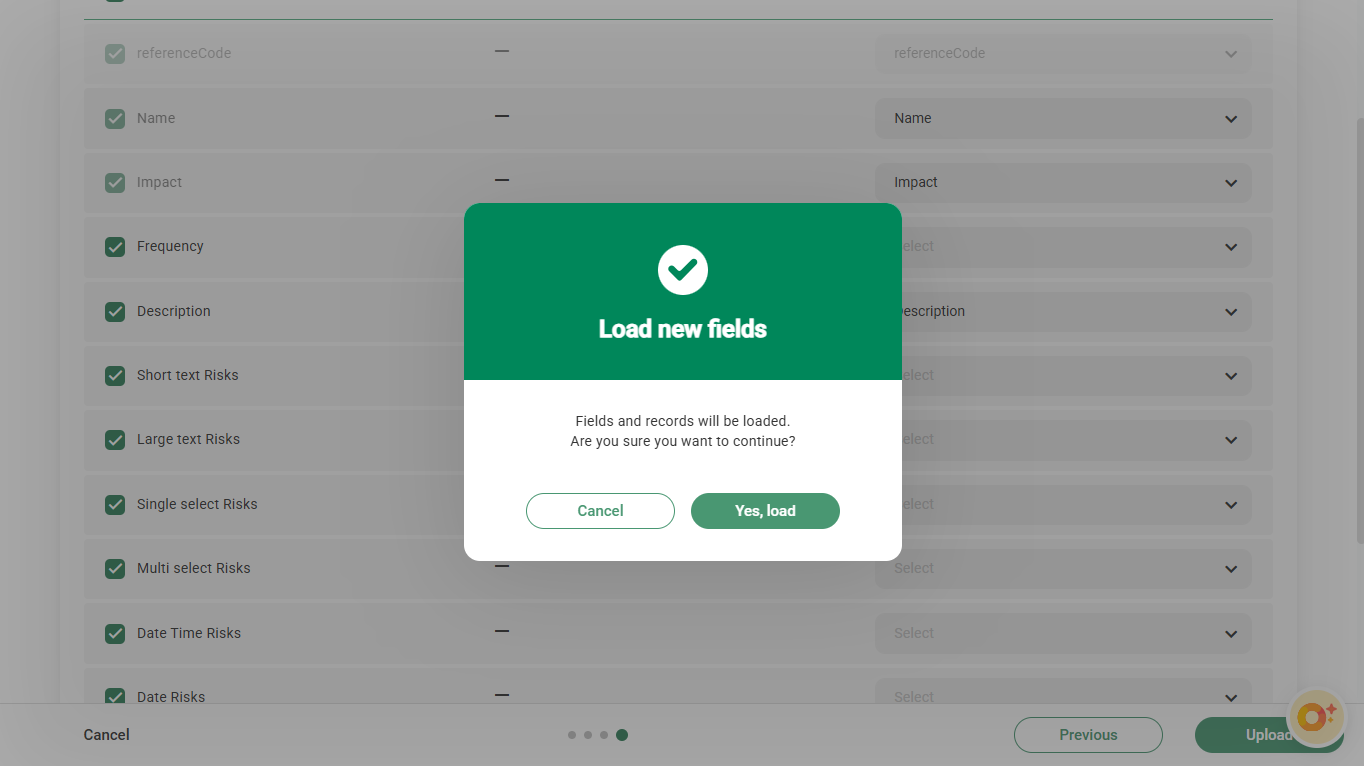
Click Next to validate that the column names in your file match those in the system.Review the information and then click the Upload button.
-1.png?width=602&height=339&name=image%20(5)-1.png)
The import status is reflected in the history, allowing you to track the progress of the process.
⚠️ Remember! If the file does not meet the specified requirements, the software will display an error message in red indicating the issues.
How to Correct Records with Errors
You can download an Excel file containing the records that encountered errors during import. This file will include an “errors” column describing the issue with each record.
After correcting the errors in the file, you can upload it again.
2. Multiple Related Entities
This option allows you to import data that includes relationships between multiple system entities (for example, risks associated with controls or causes).
.png?width=602&height=331&name=image%20(2).png)
Steps for Uploading:
- Select the main (parent) entity you want to import (for example: risks).
-2.png?width=602&height=340&name=image%20(4)-2.png)
2. Next, the system will display the associated entities you want to include in the import. Select the upload action you want to perform for the parent entity to start loading its associations.
.png?width=602&height=344&name=image%20(9).png)
- The referenceCode field for each record.
- The parentReferenceCode field for entities that are hierarchically dependent on another.
- All the data you wish to create or update.
.png?width=688&height=379&name=image%20(10).png)
How Does Bulk Risk Update Work?
The bulk update functionality allows you to modify multiple risk records simultaneously. To do this, you must use an upload file in which the only mandatory field is the referenceCode, which must match the existing information in the system.
It is only necessary to include the fields you want to update in the file. Fields that do not require modification can be left blank or omitted from the file, as they will remain unaffected.
Next:
- Click Next.
- Validate that the fields in the .csv file correctly align with those in the system.
- Verify the structure.
.png?width=602&height=344&name=image%20(11).png)
- Select Upload.
Once the upload is confirmed, the system will process the data and update the history. You will be able to review the results and download records with errors if any inconsistencies arise..png?width=688&height=384&name=image%20(13).png)
Key Considerations
- The referenceCode is the unique identifier for each record and must remain consistent.
- For associated entities, ensure they are correctly linked to their main entity using the parentReferenceCode.
- The system only accepts files in .csv format and will automatically validate that the columns match the form fields.
Now you can do it! Start managing your risks.
Don't have the Starter plan? Schedule a demo! →
Don’t forget to rate us 👇. Your feedback is very important!