This functionality is first implemented in Events and will be gradually extended to Clients and Counterparties.
In addition, attachment fields, person fields, and groups are enabled in most entities (except Clients, Counterparties, Products, and Transactions), which facilitates document management and assignment of responsible users.
👉 Available from the Starter plan.
How to access calculated fields?
1.Go to Configuration.
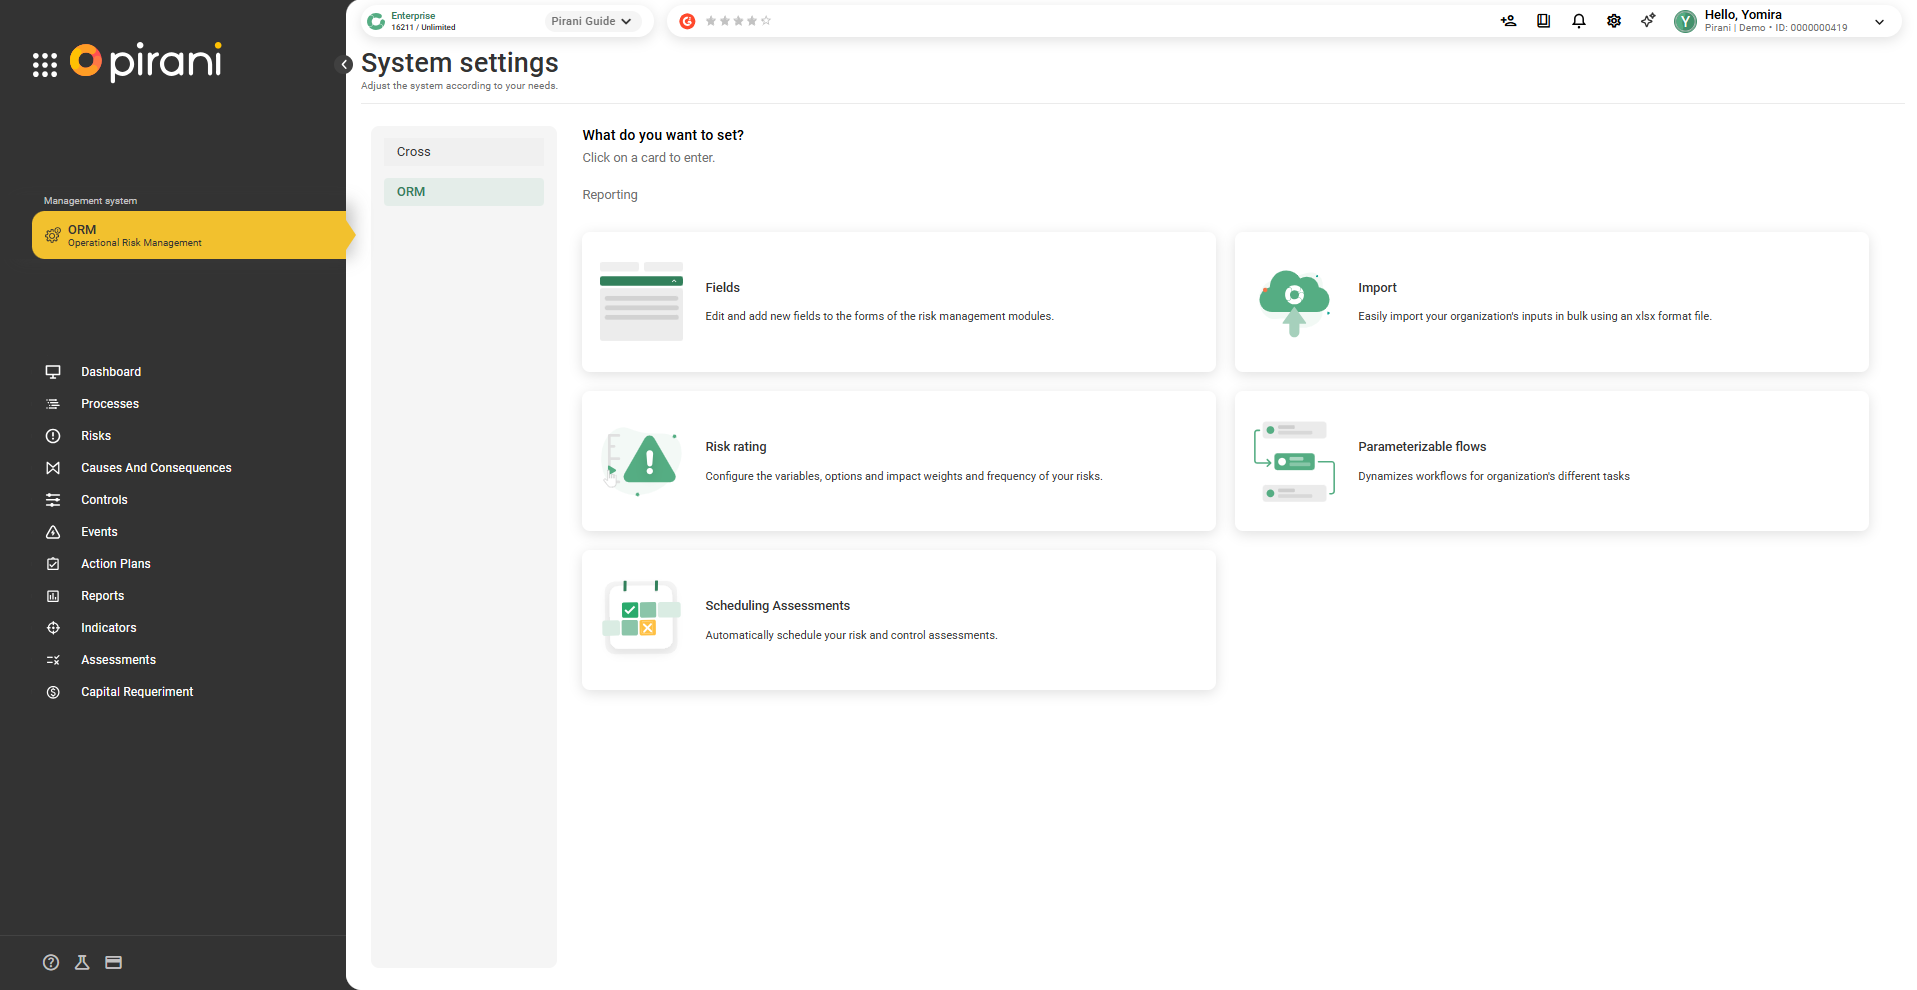
2.Select the Fields option and then Enter.
How to add a calculated field?
1.Select the Events module where you want to add the field.
2.In the module's general information section, in the lower-right corner, you will see the options Add and New division.
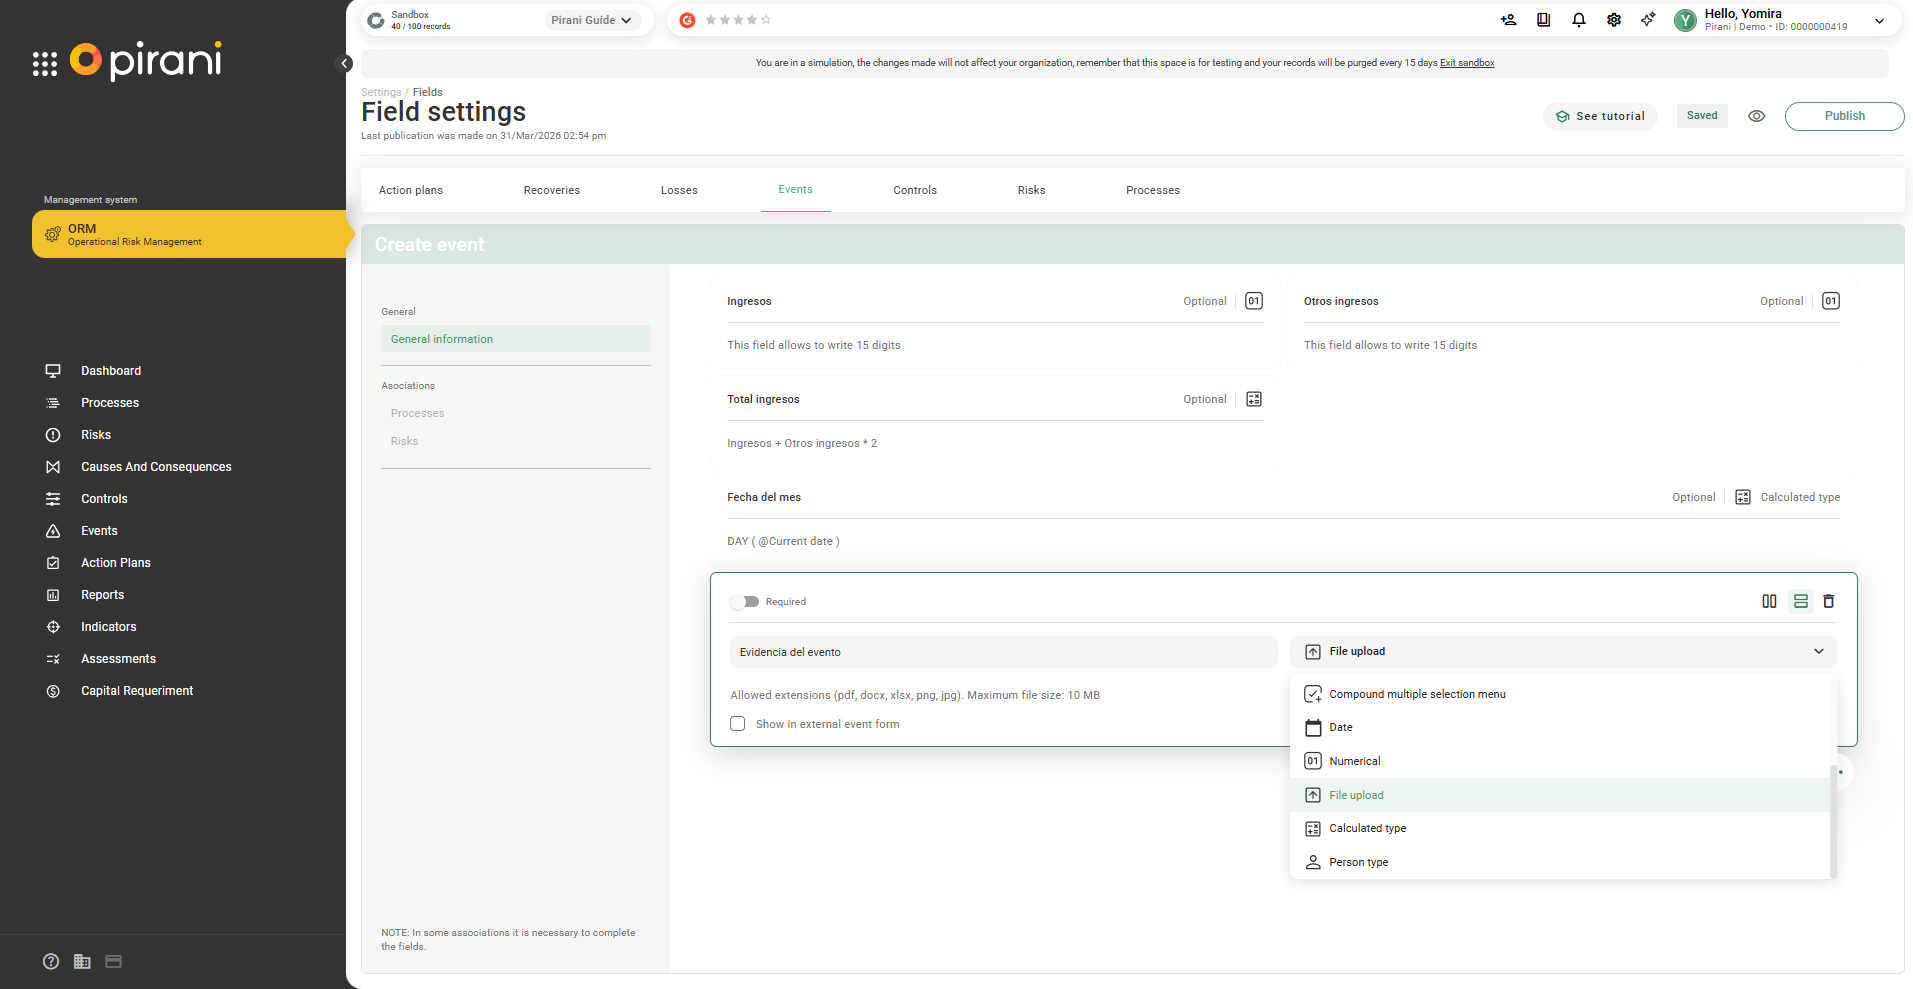
3.Within the entity you have chosen, click the + button to add a new field and define it as a calculated field according to your needs.
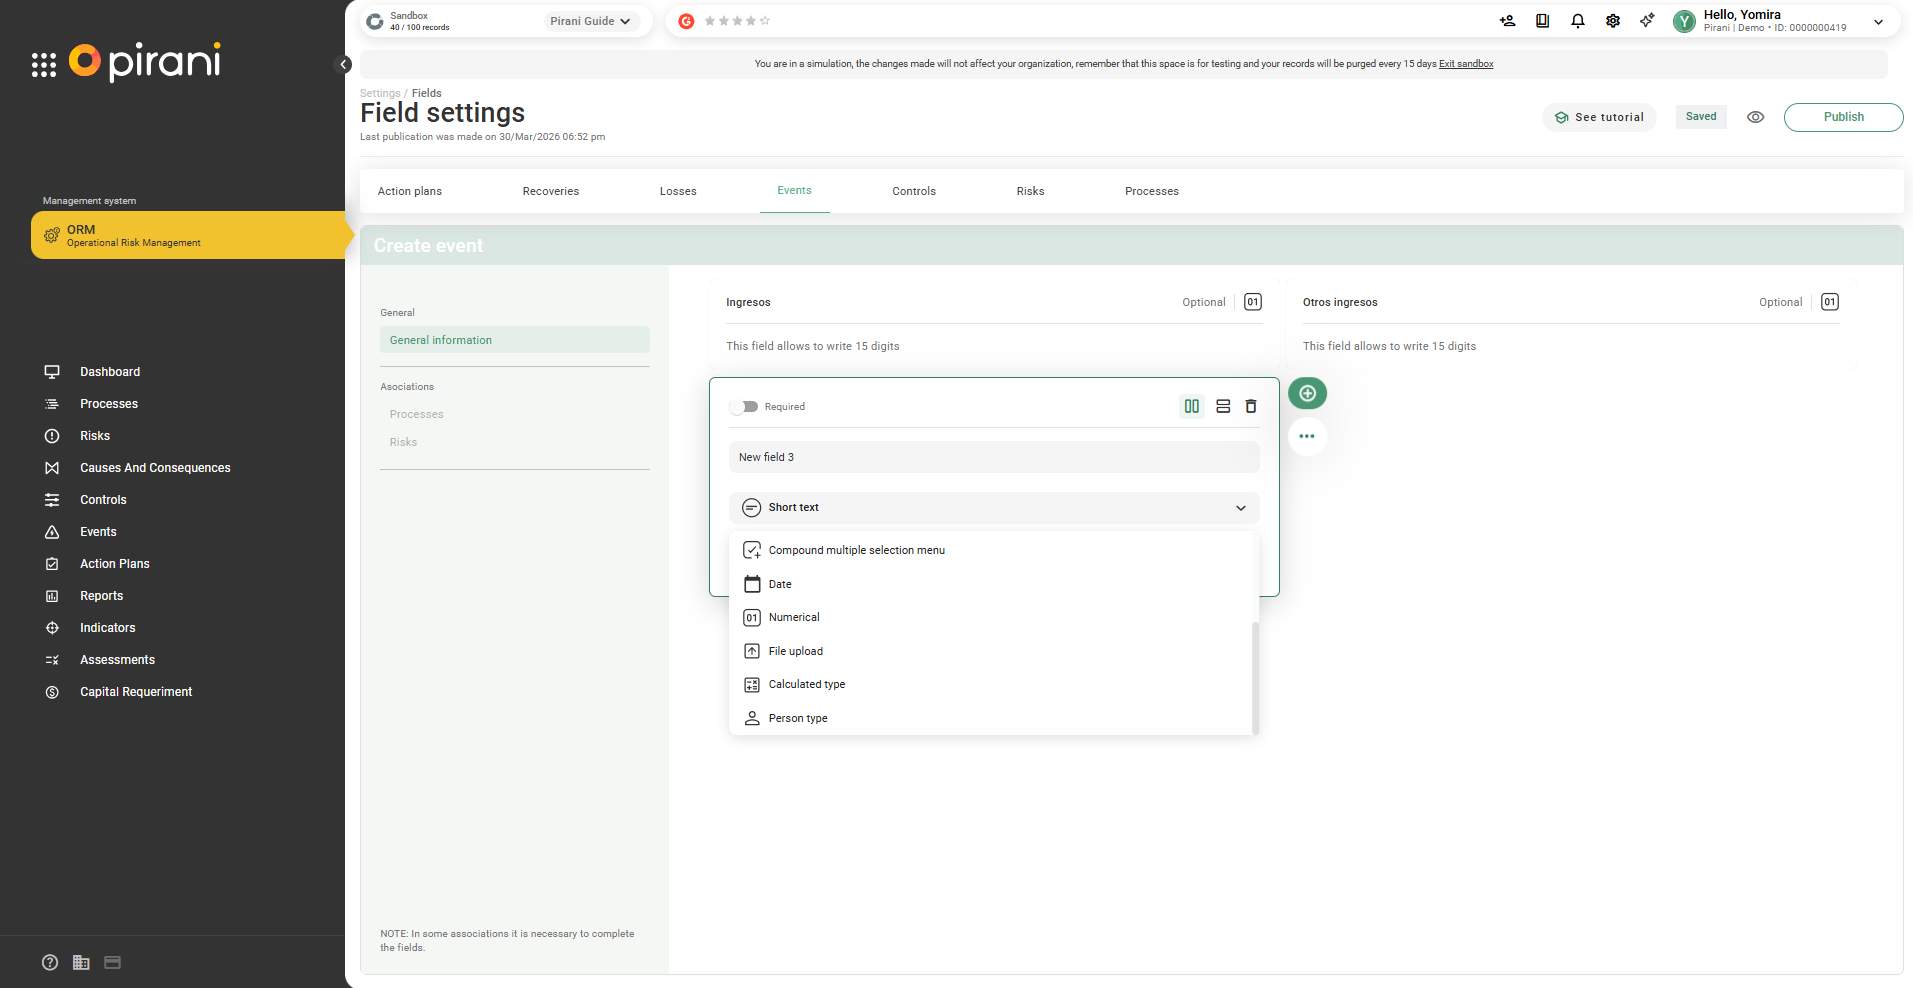
Available types of calculated fields:
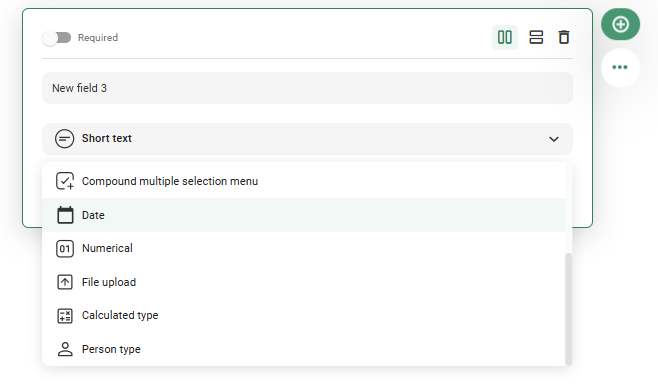
Calculated field
This type of field allows you to automatically generate values from other data. It includes three options:
- Arithmetic calculation
- Date calculation
- Index calculation (soon)
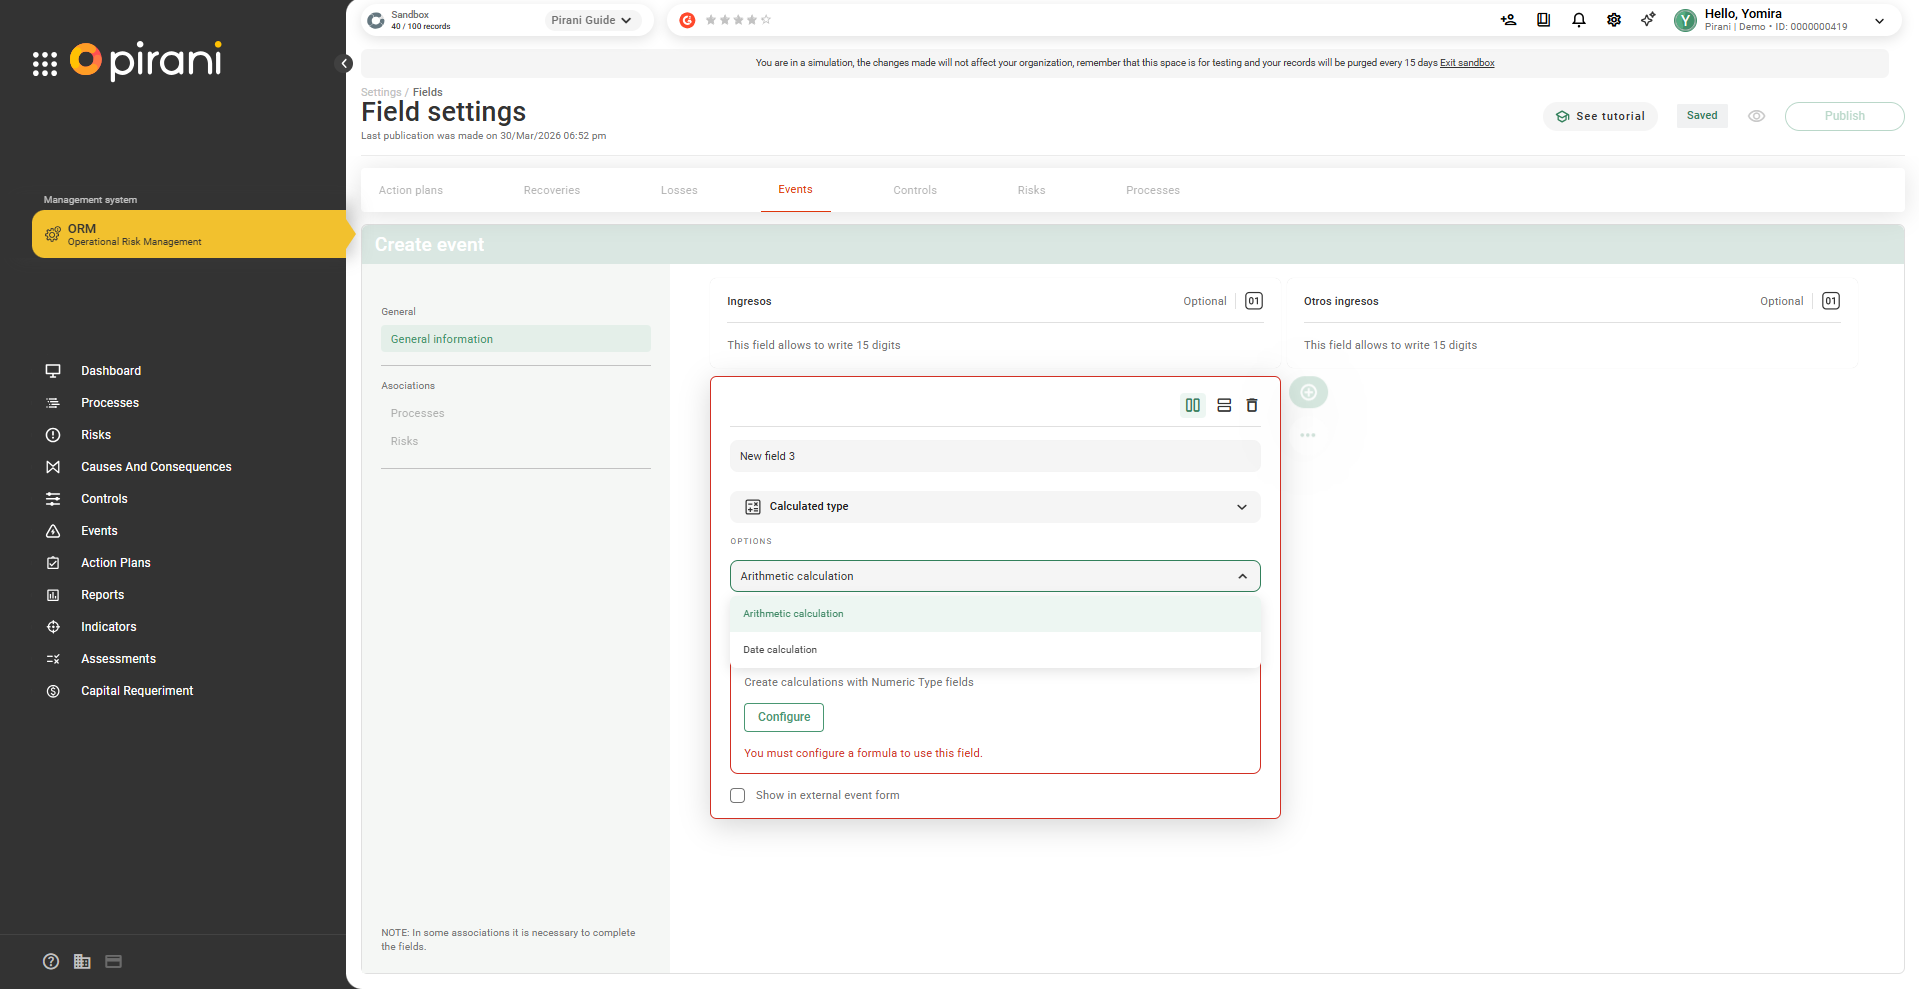
Arithmetic calculation
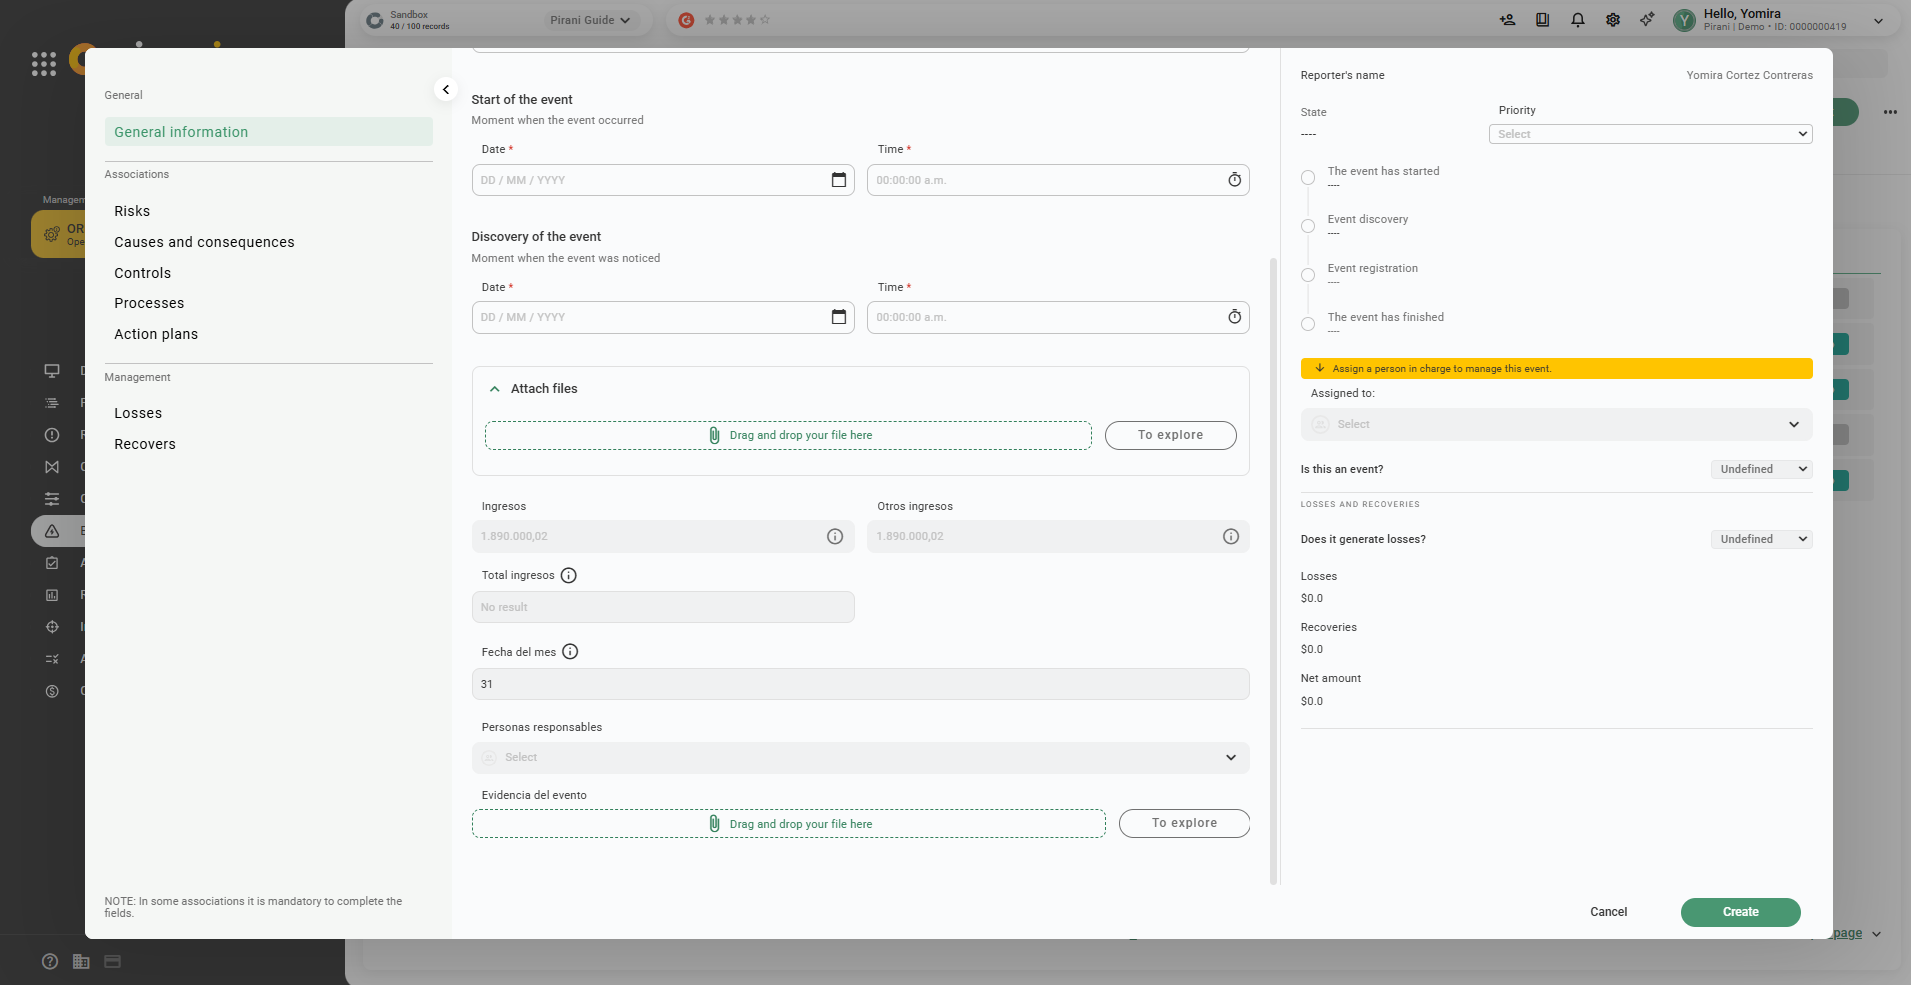
Allows performing operations between numeric values. To use this functionality, numeric fields must already exist in the form, as the system only allows operations with this type of data. The calculation can include both dynamic fields and fixed fields available in the system, as long as they are numeric.
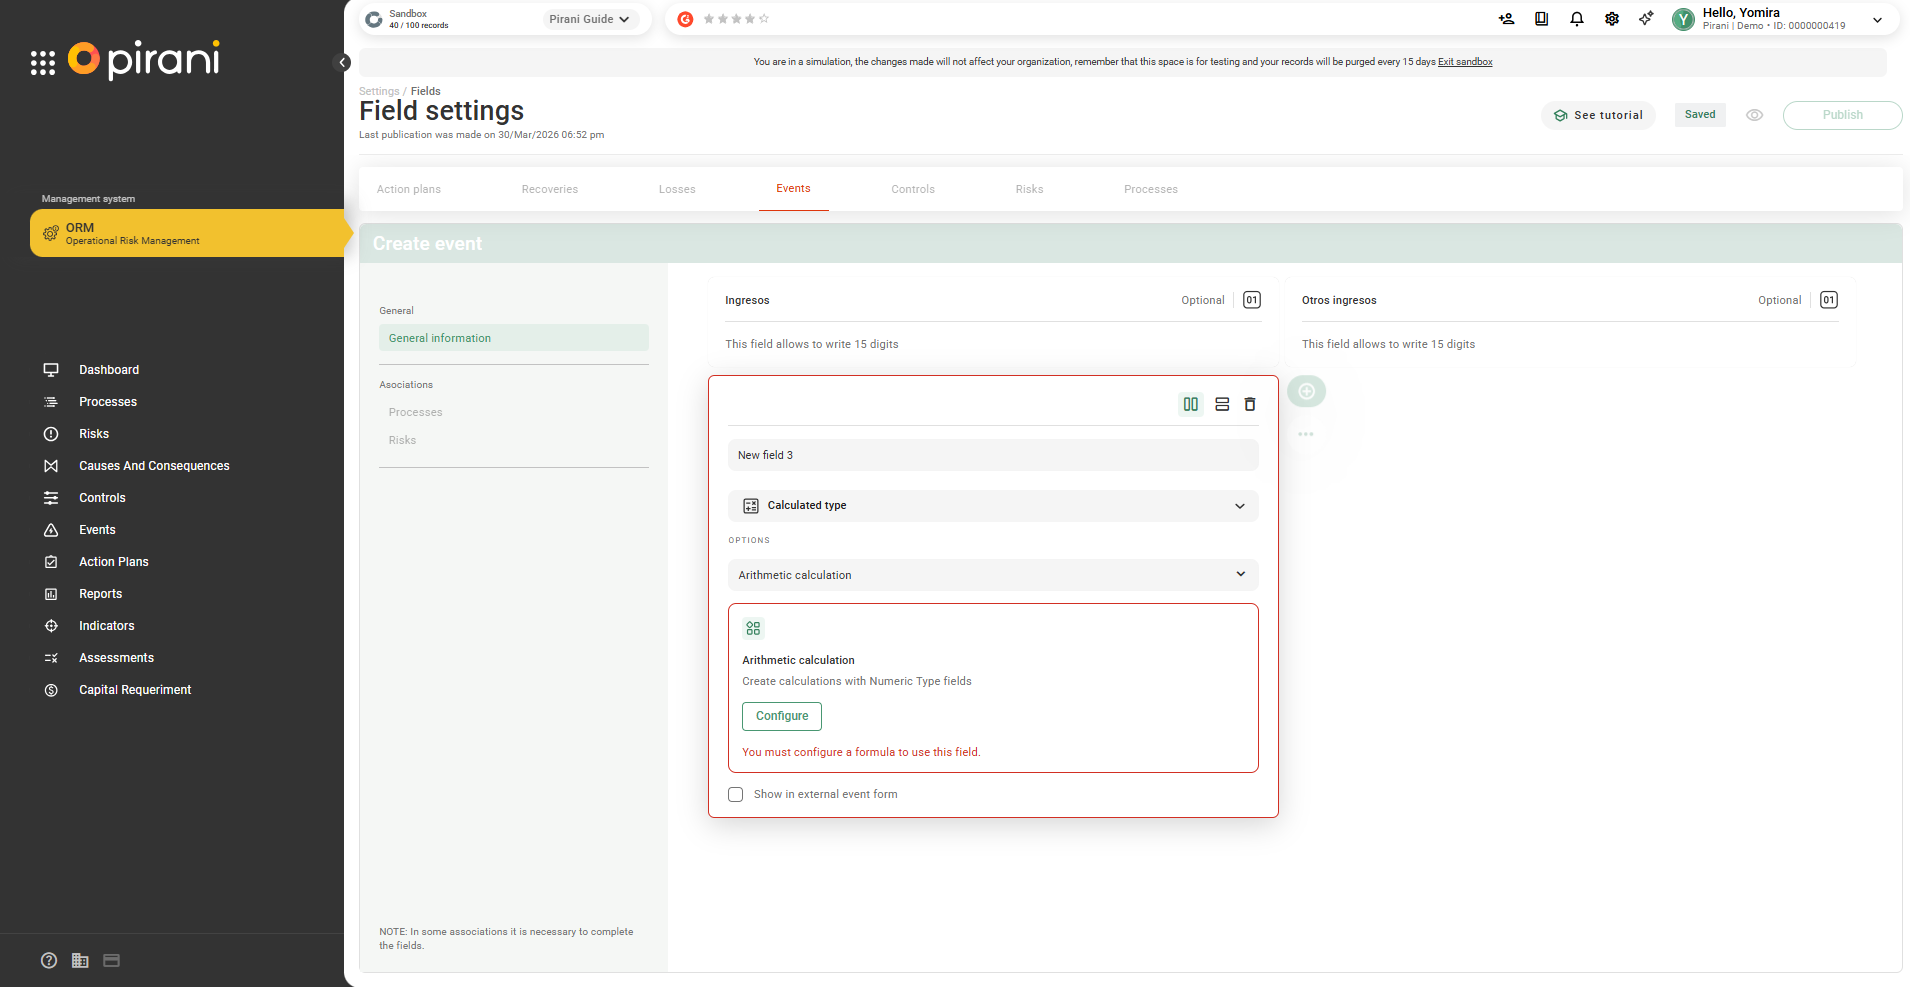
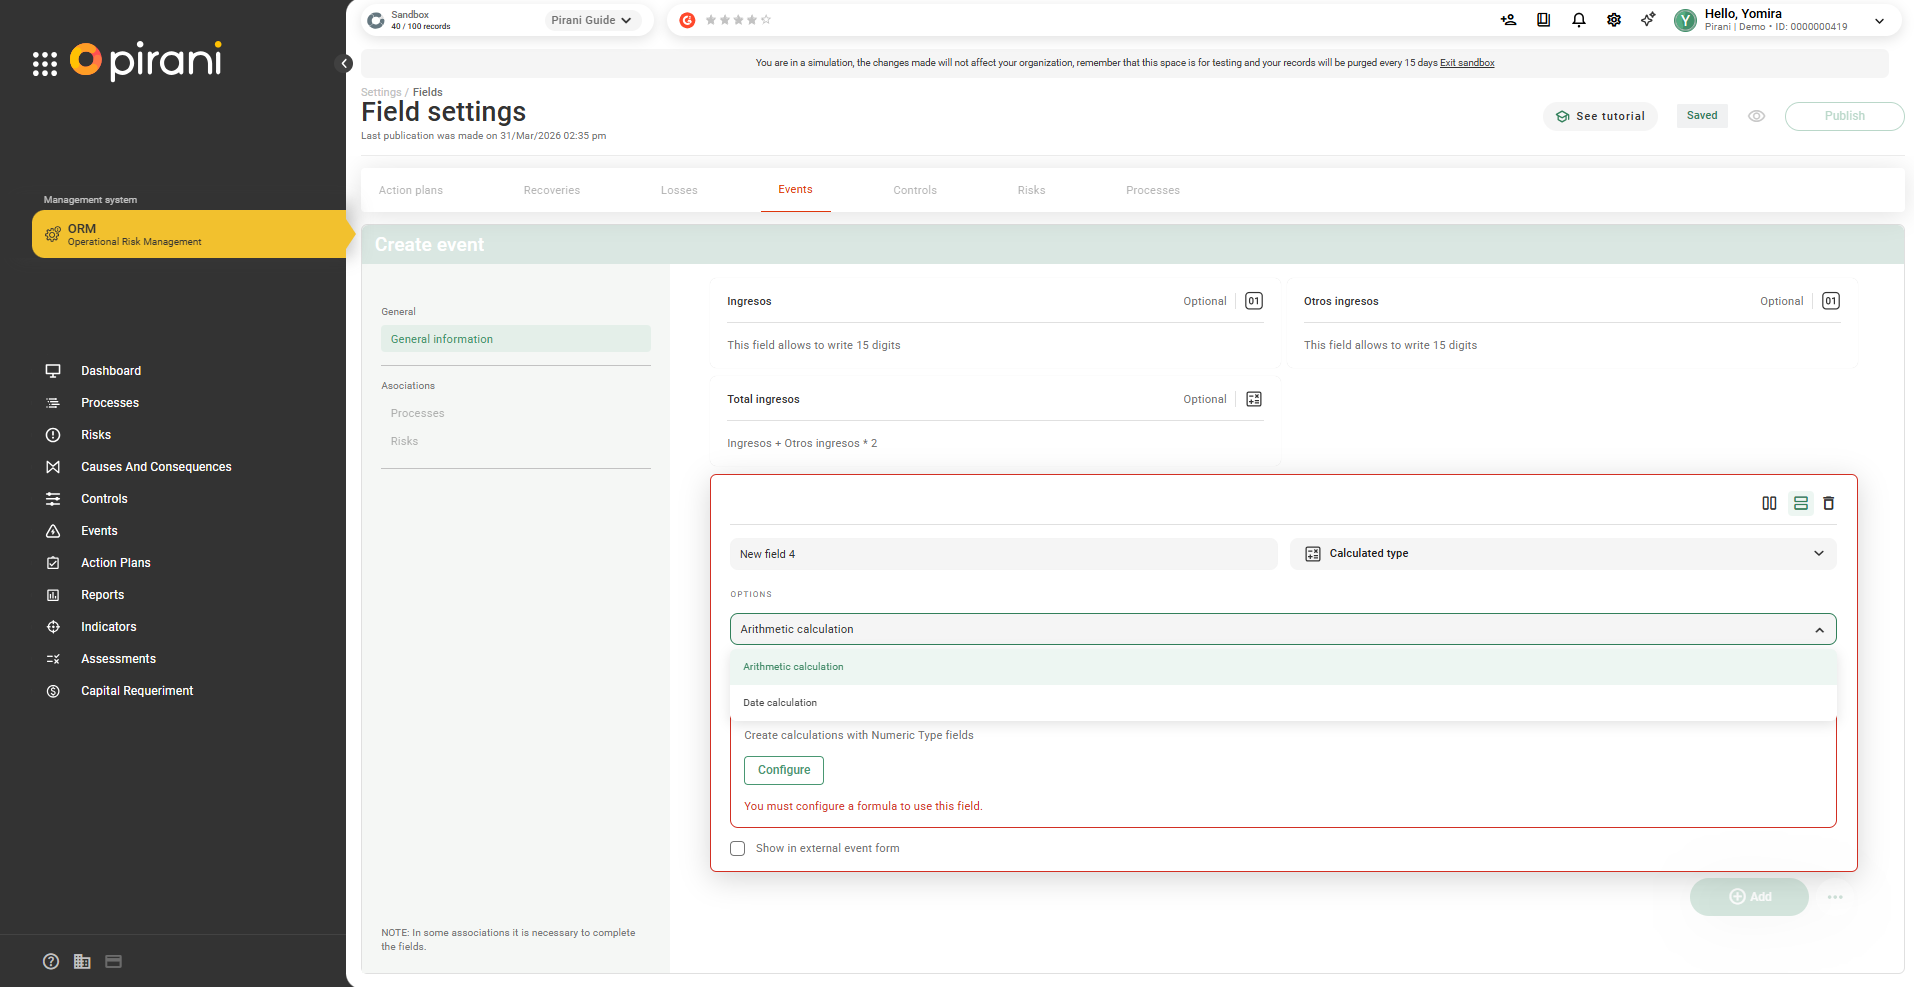
Step 1: Select Configure to create the formula.
Example:
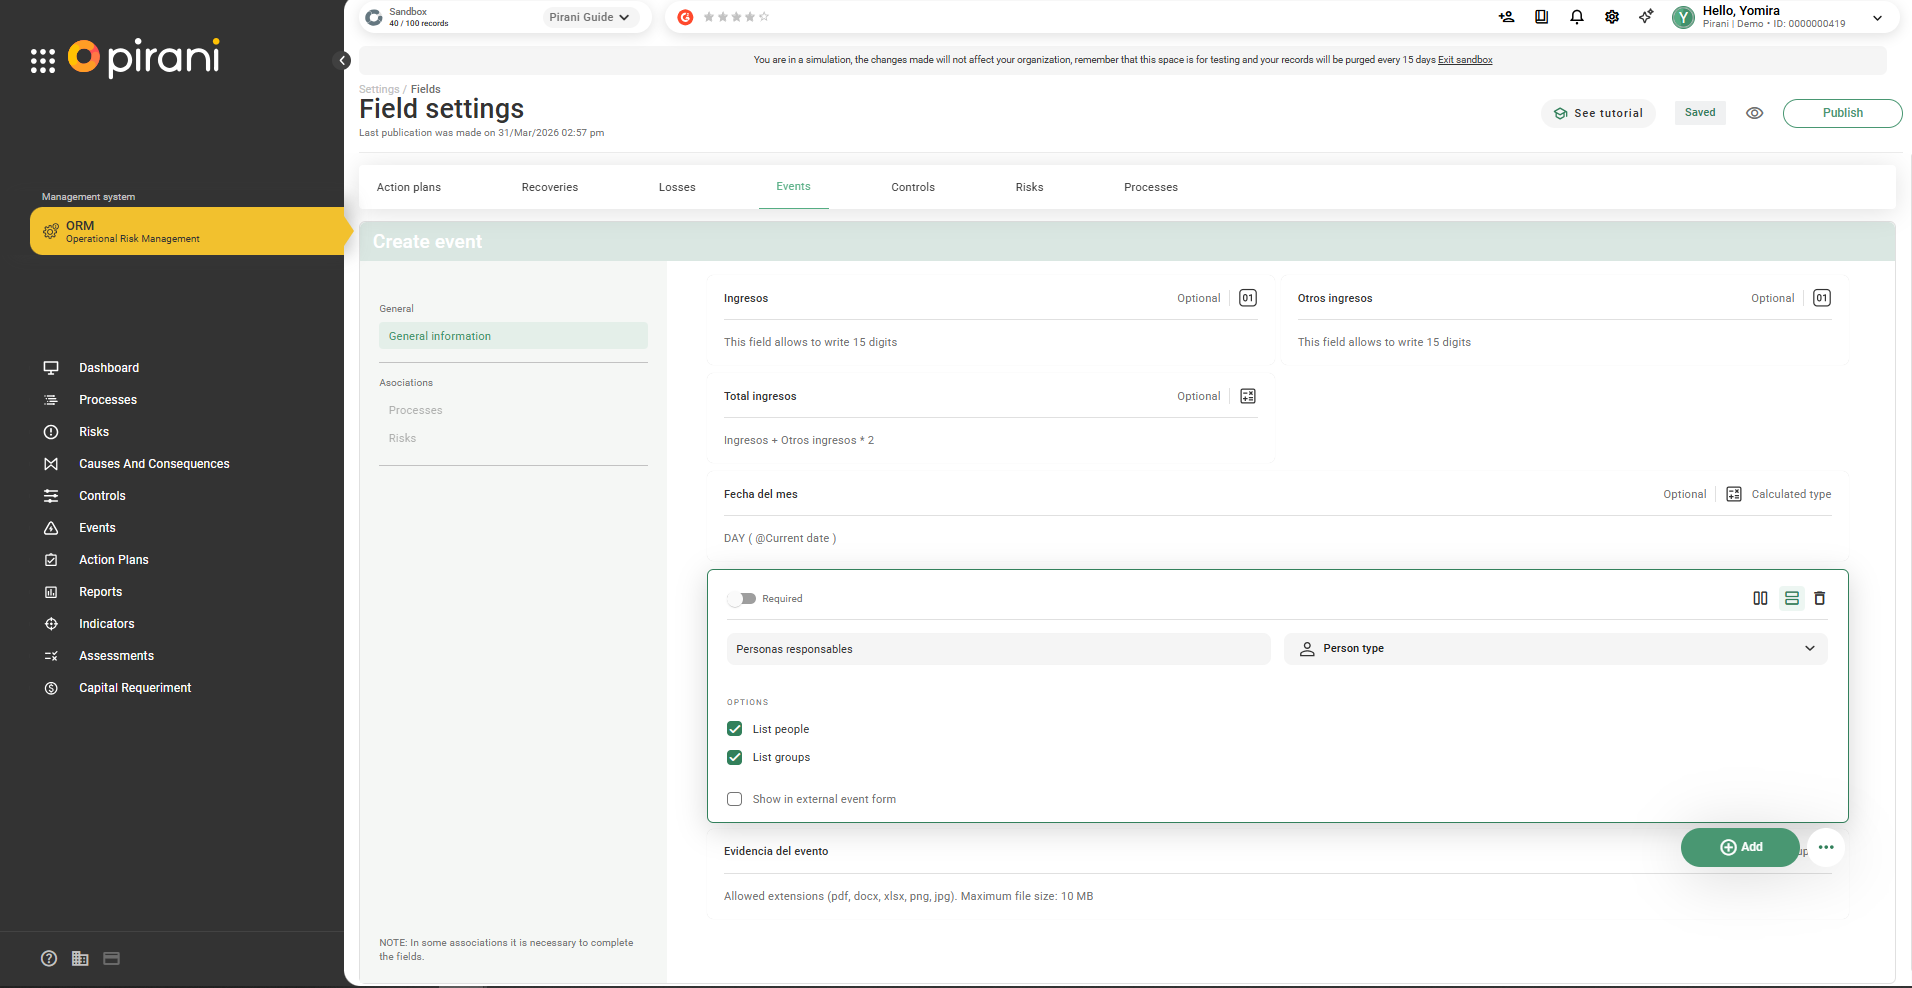
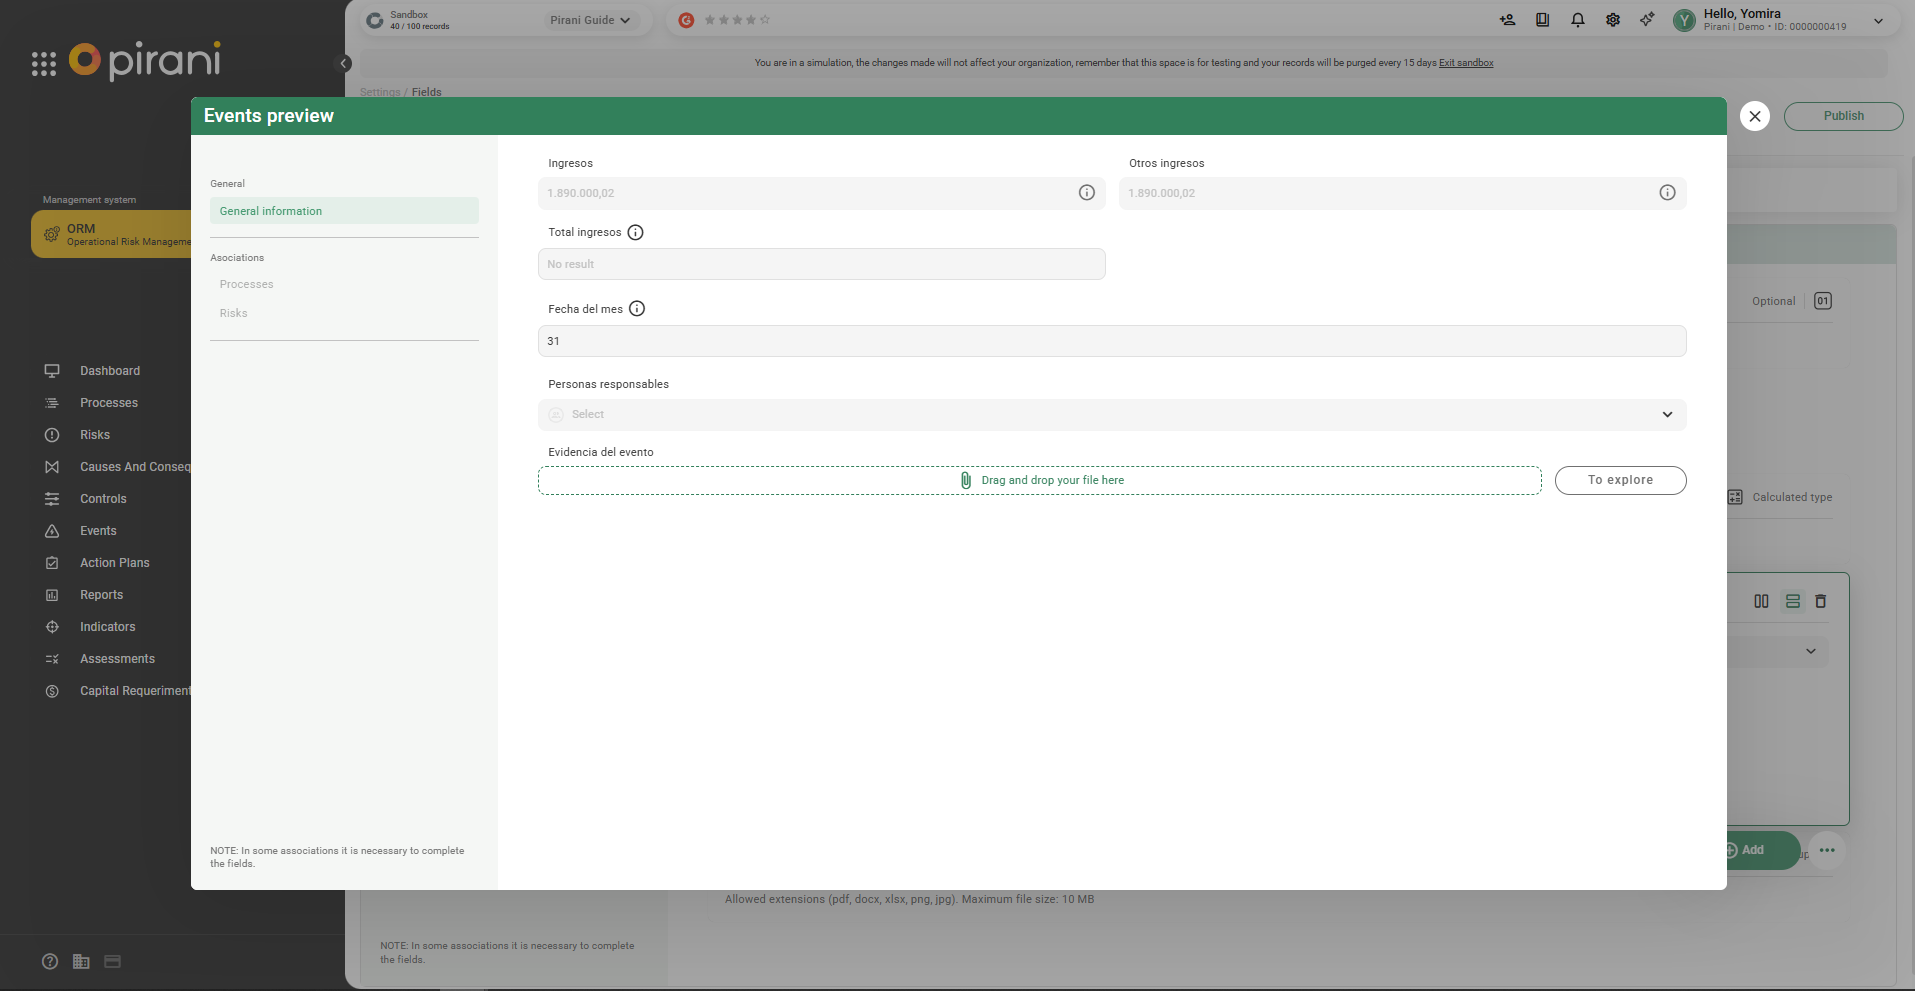
Step 2: Create the following fields:
- Income (numeric)
- Other income (numeric)
- Total income (calculated)
In the Total income field, click Configure.
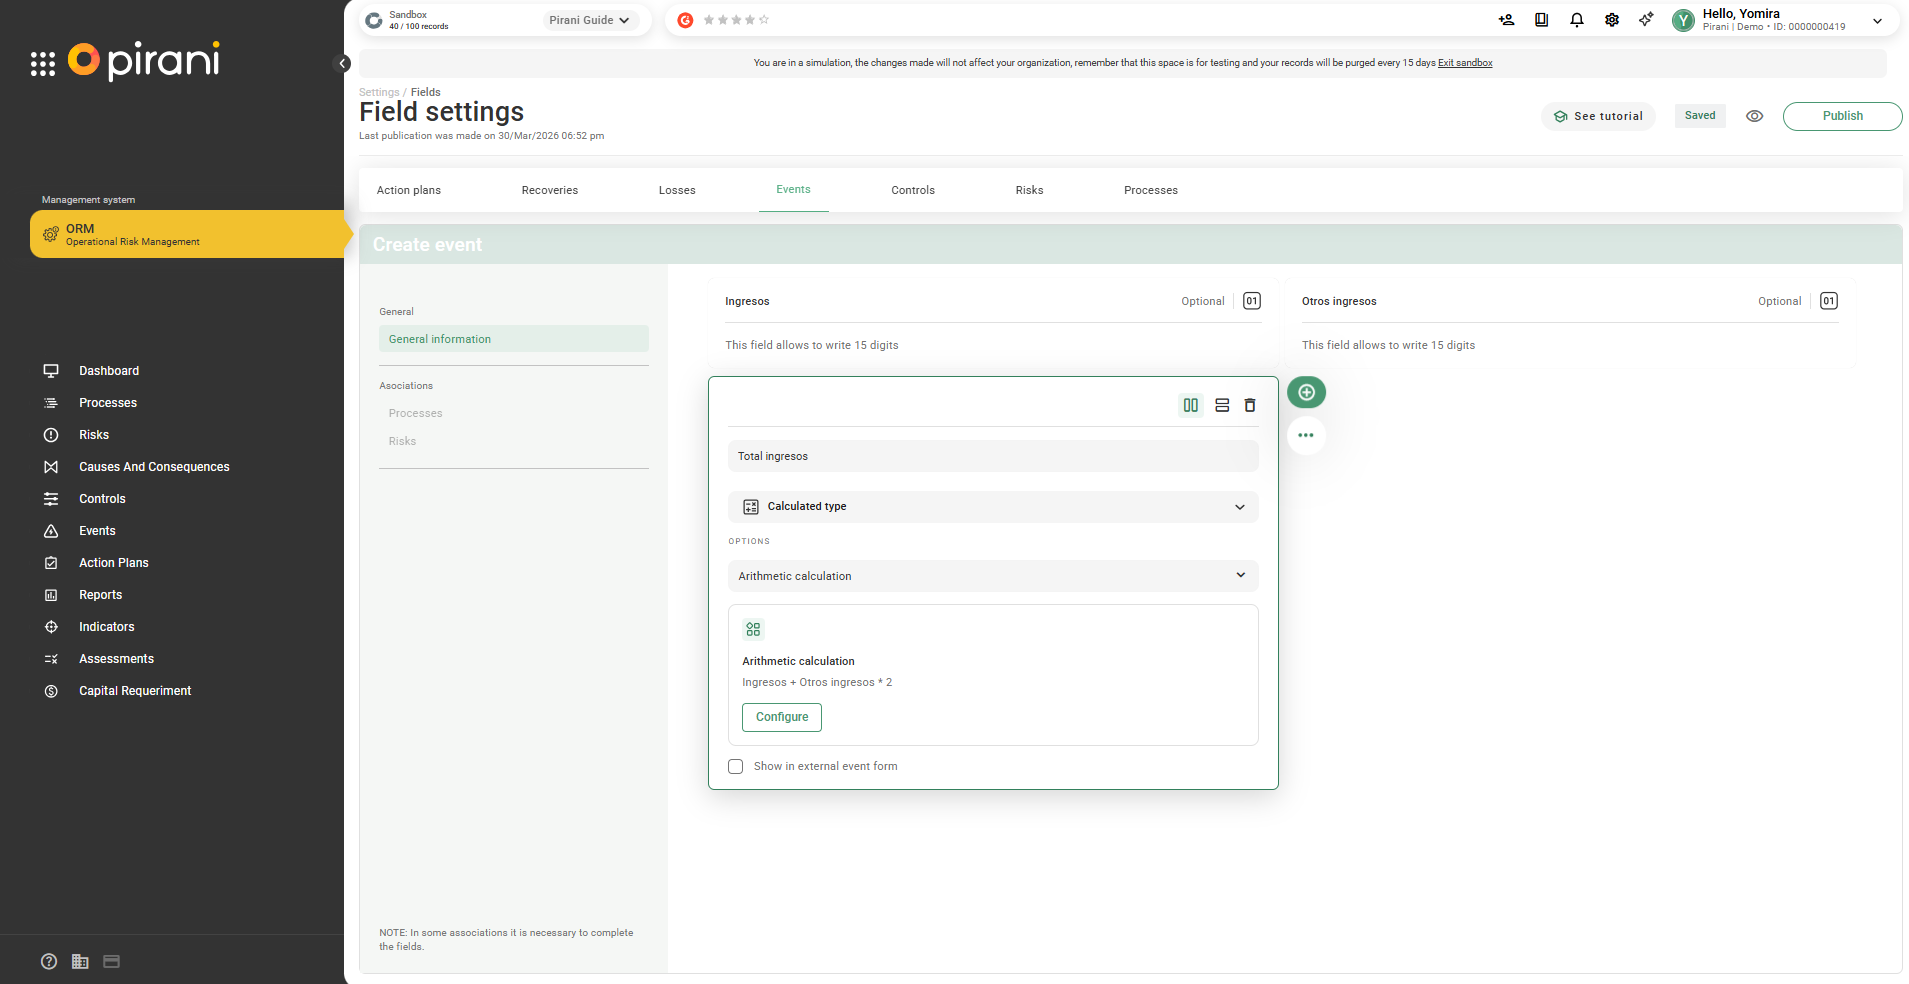
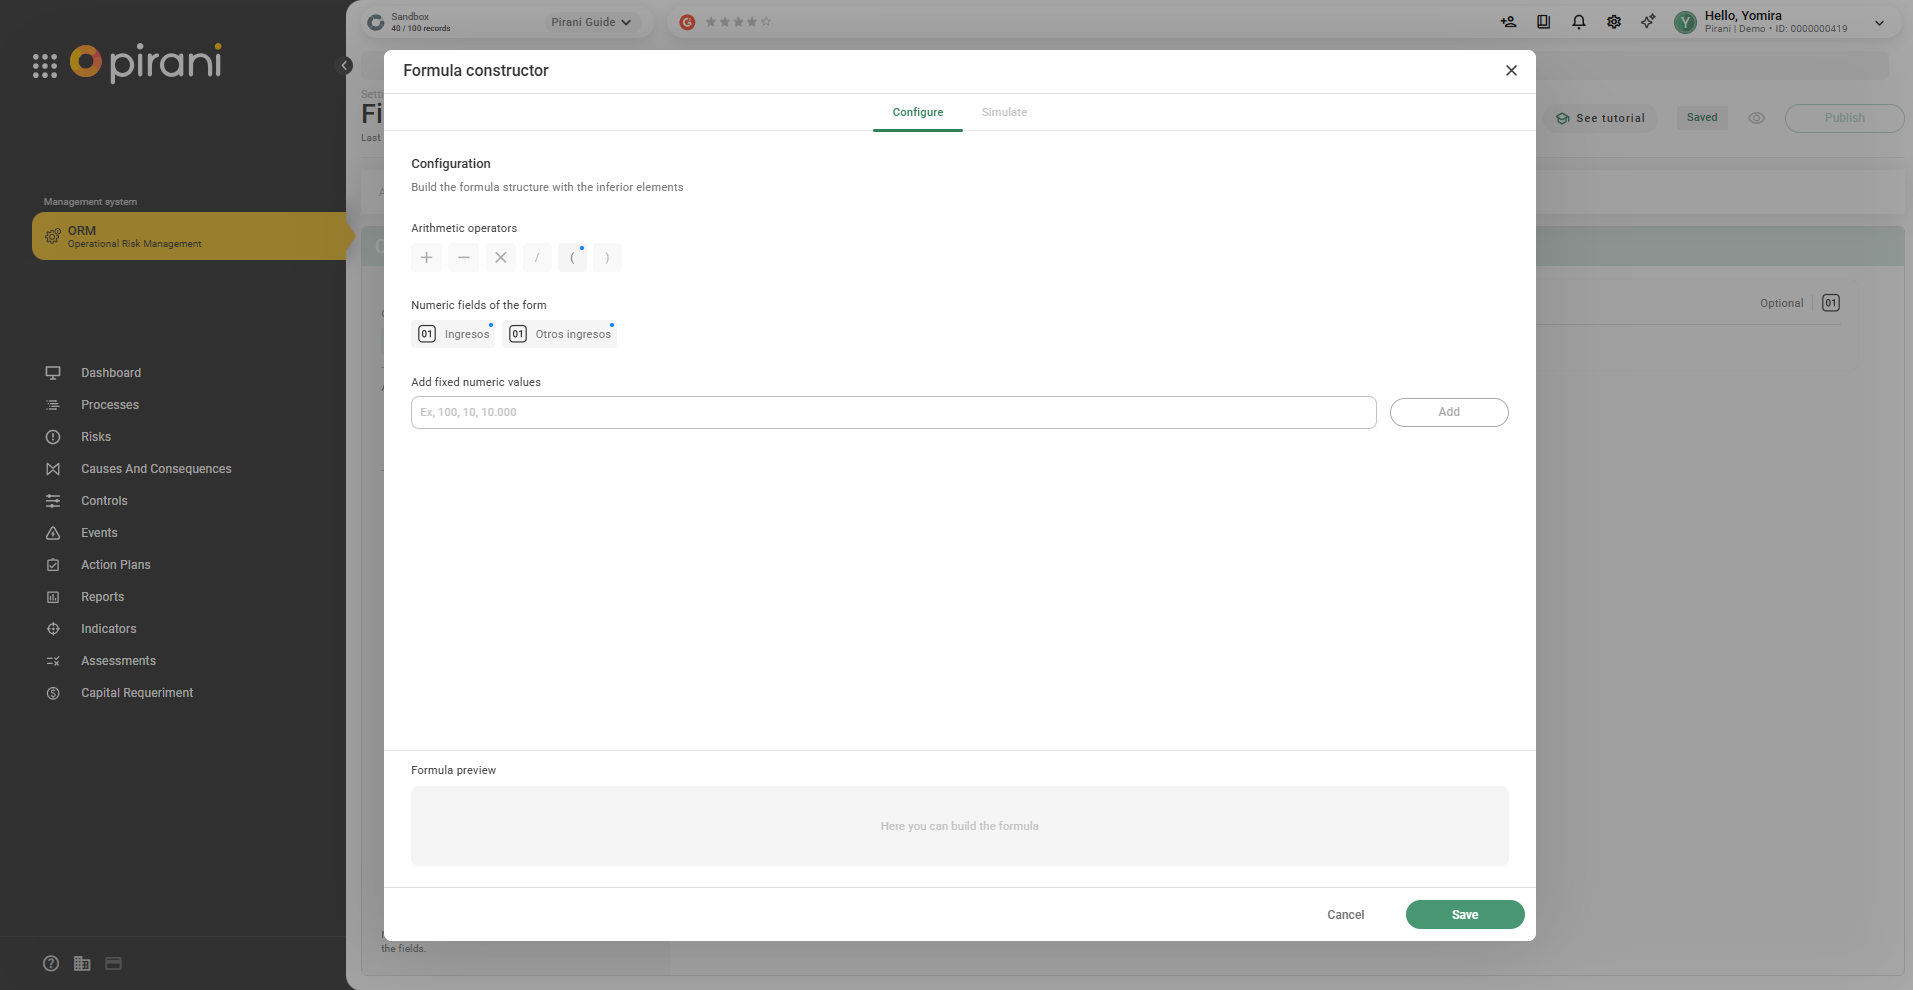
Step 3: The system will display the available operators and the numeric fields in the form.
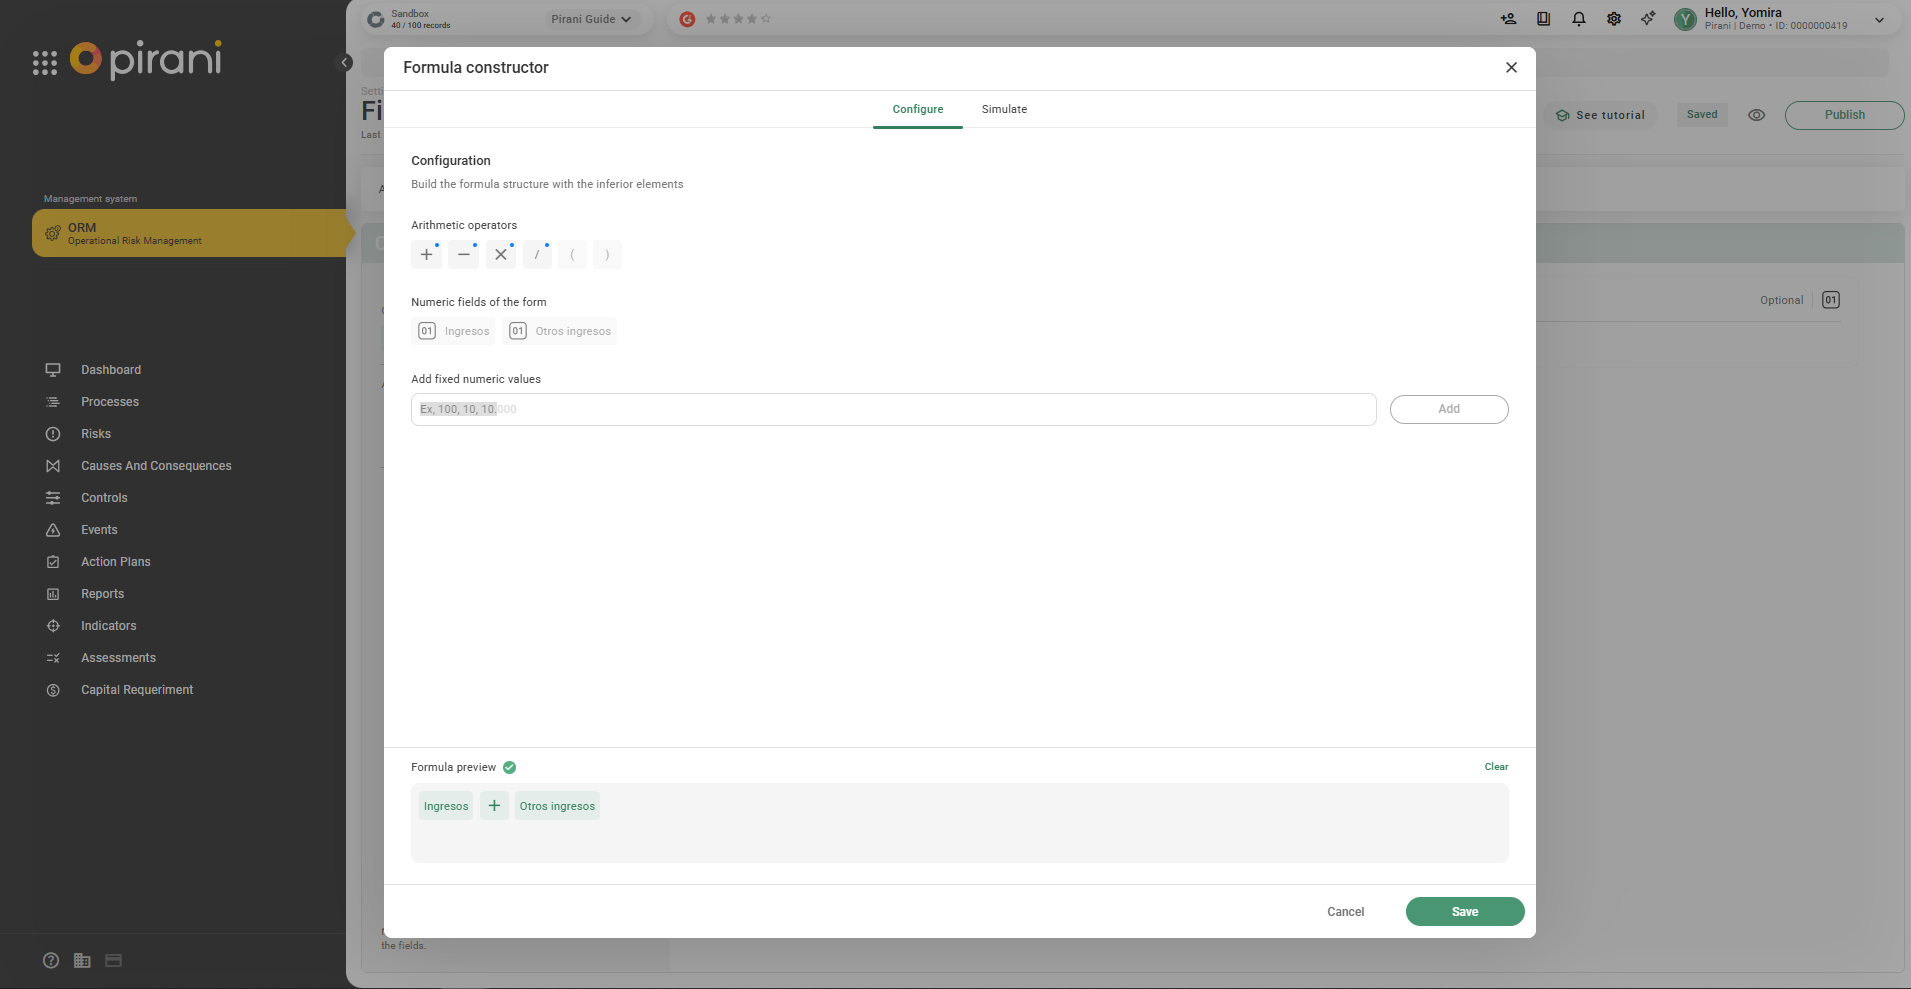
Step 4: Build the formula:
- Select the Income field
- Choose the operator +
- Select Other income

💡 You can also add fixed values in the formula, but to add these the system may ask you to include another arithmetic operator depending on the formula.
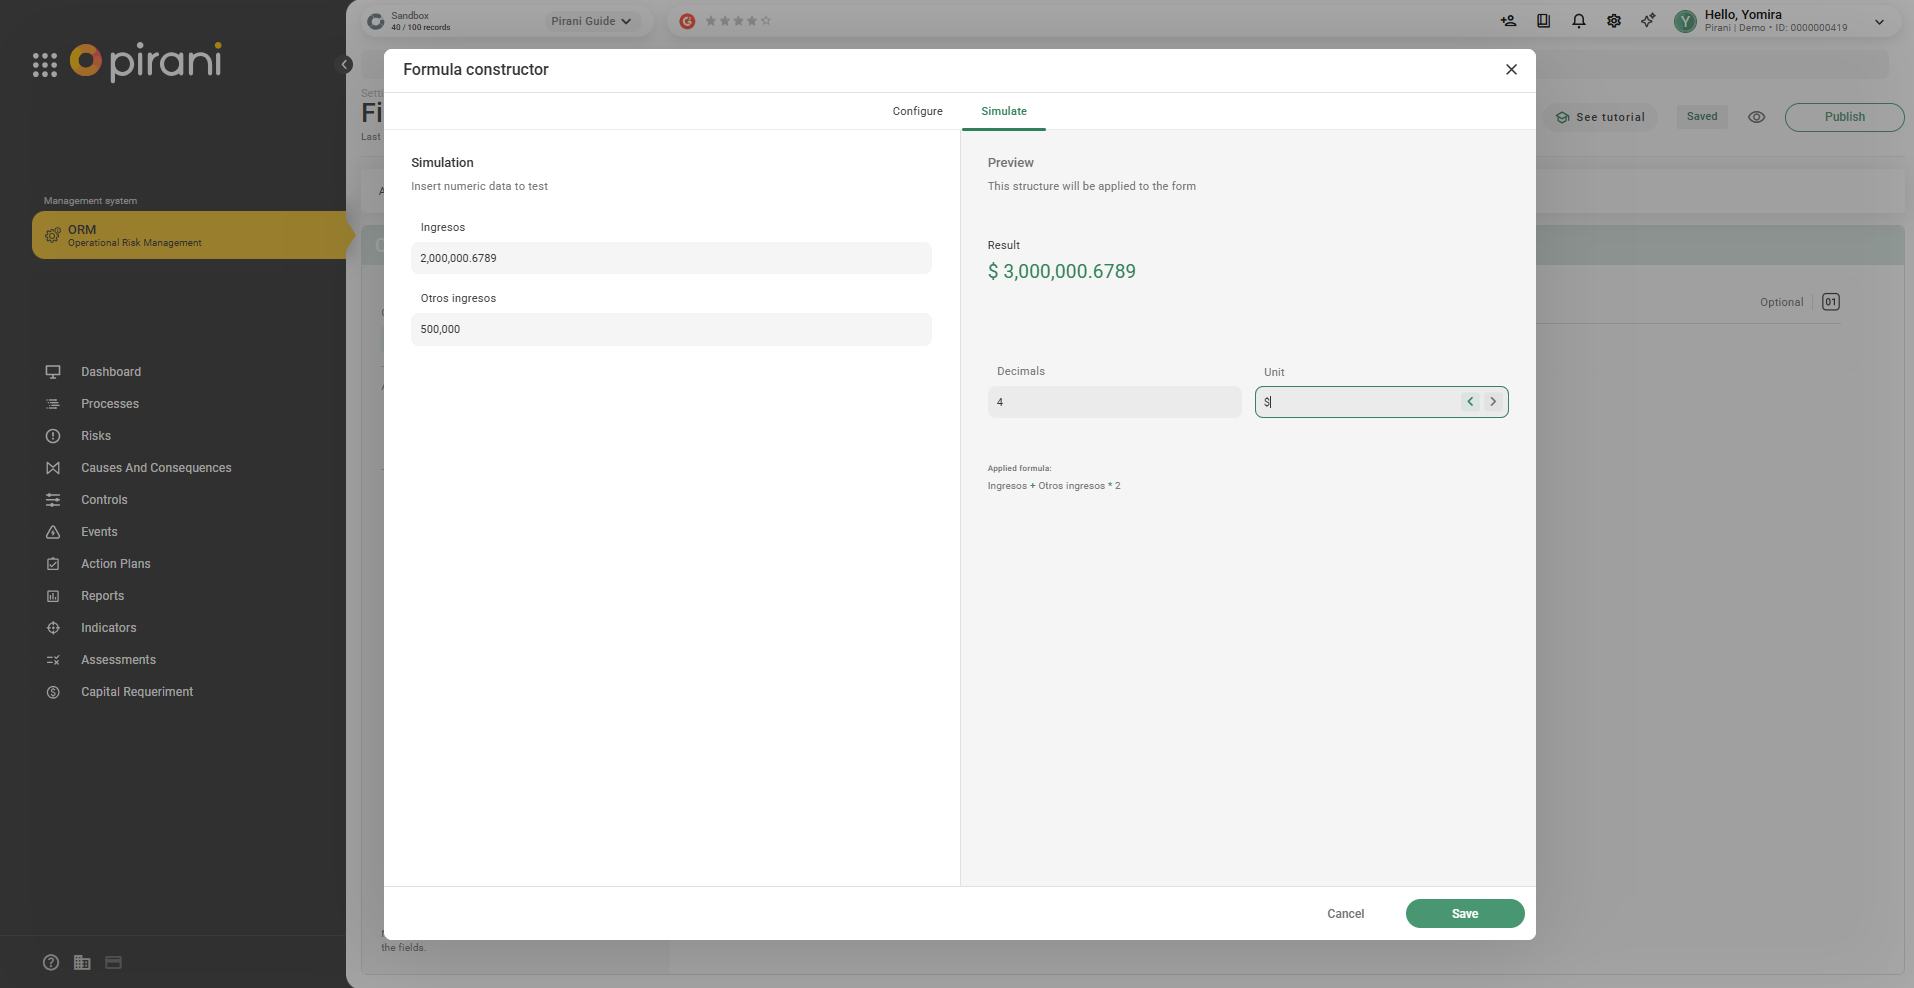
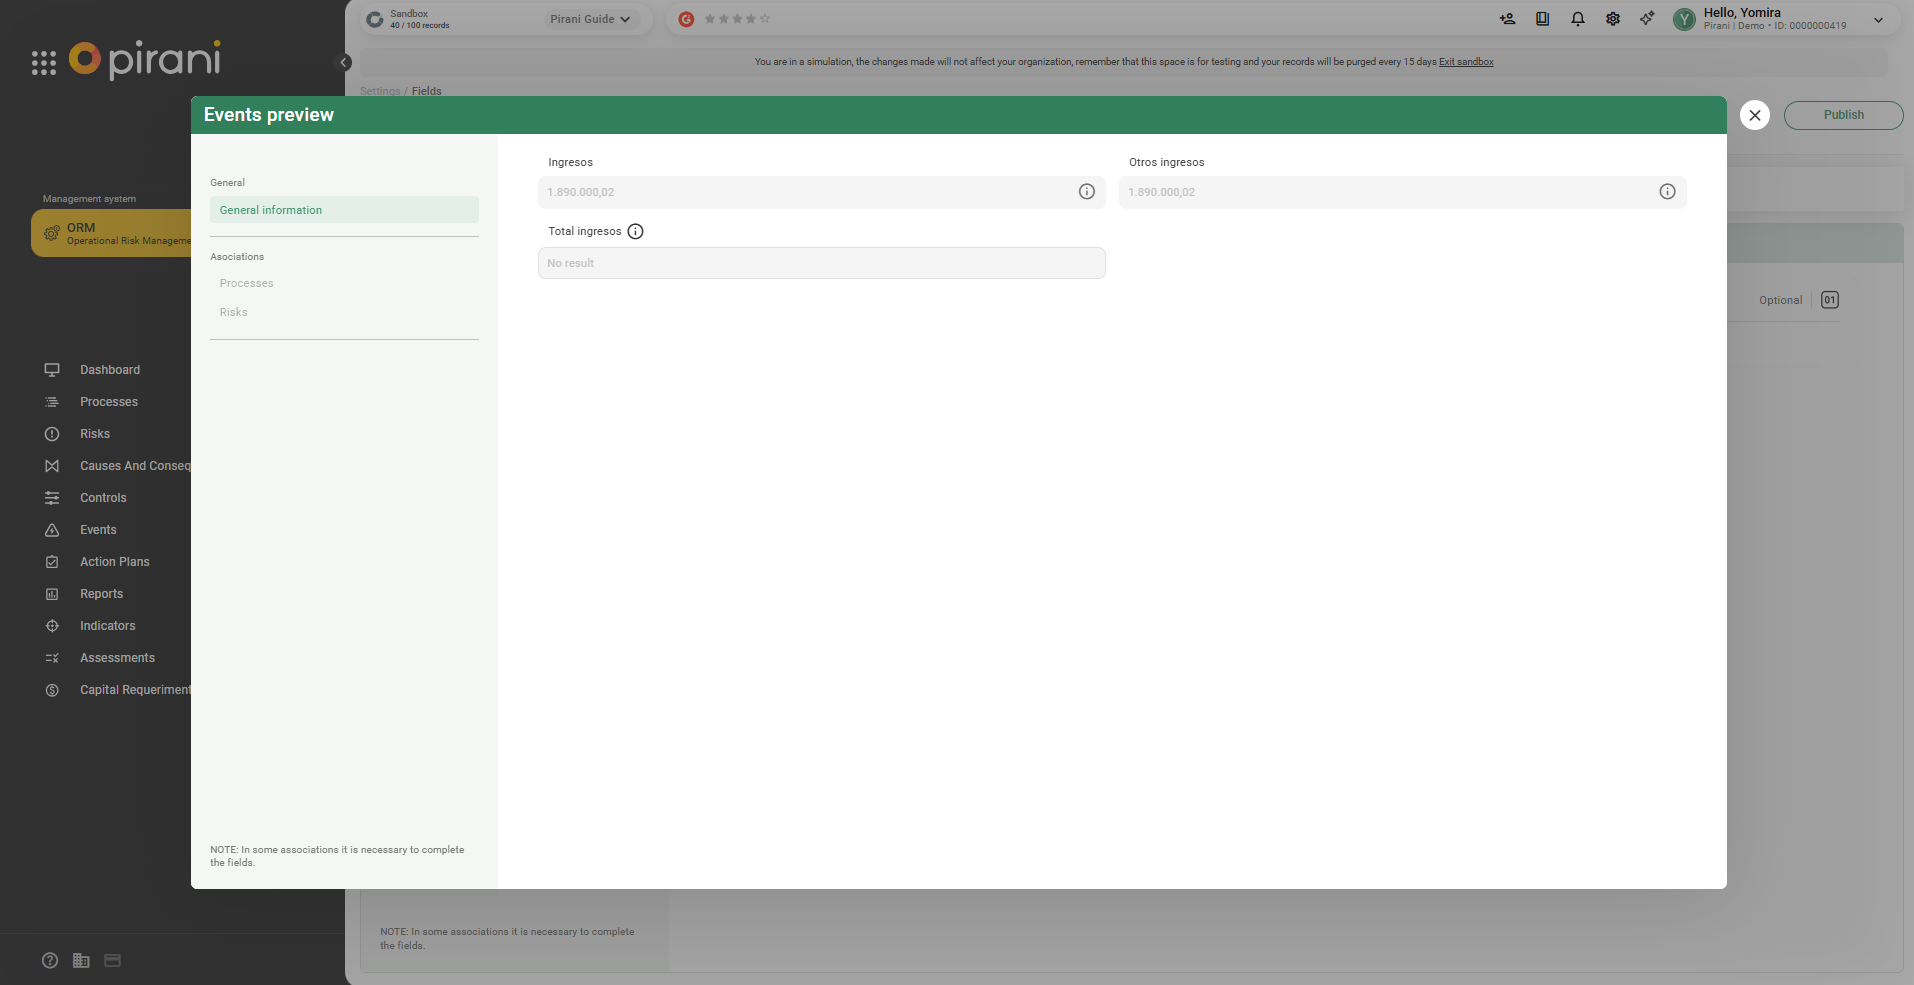
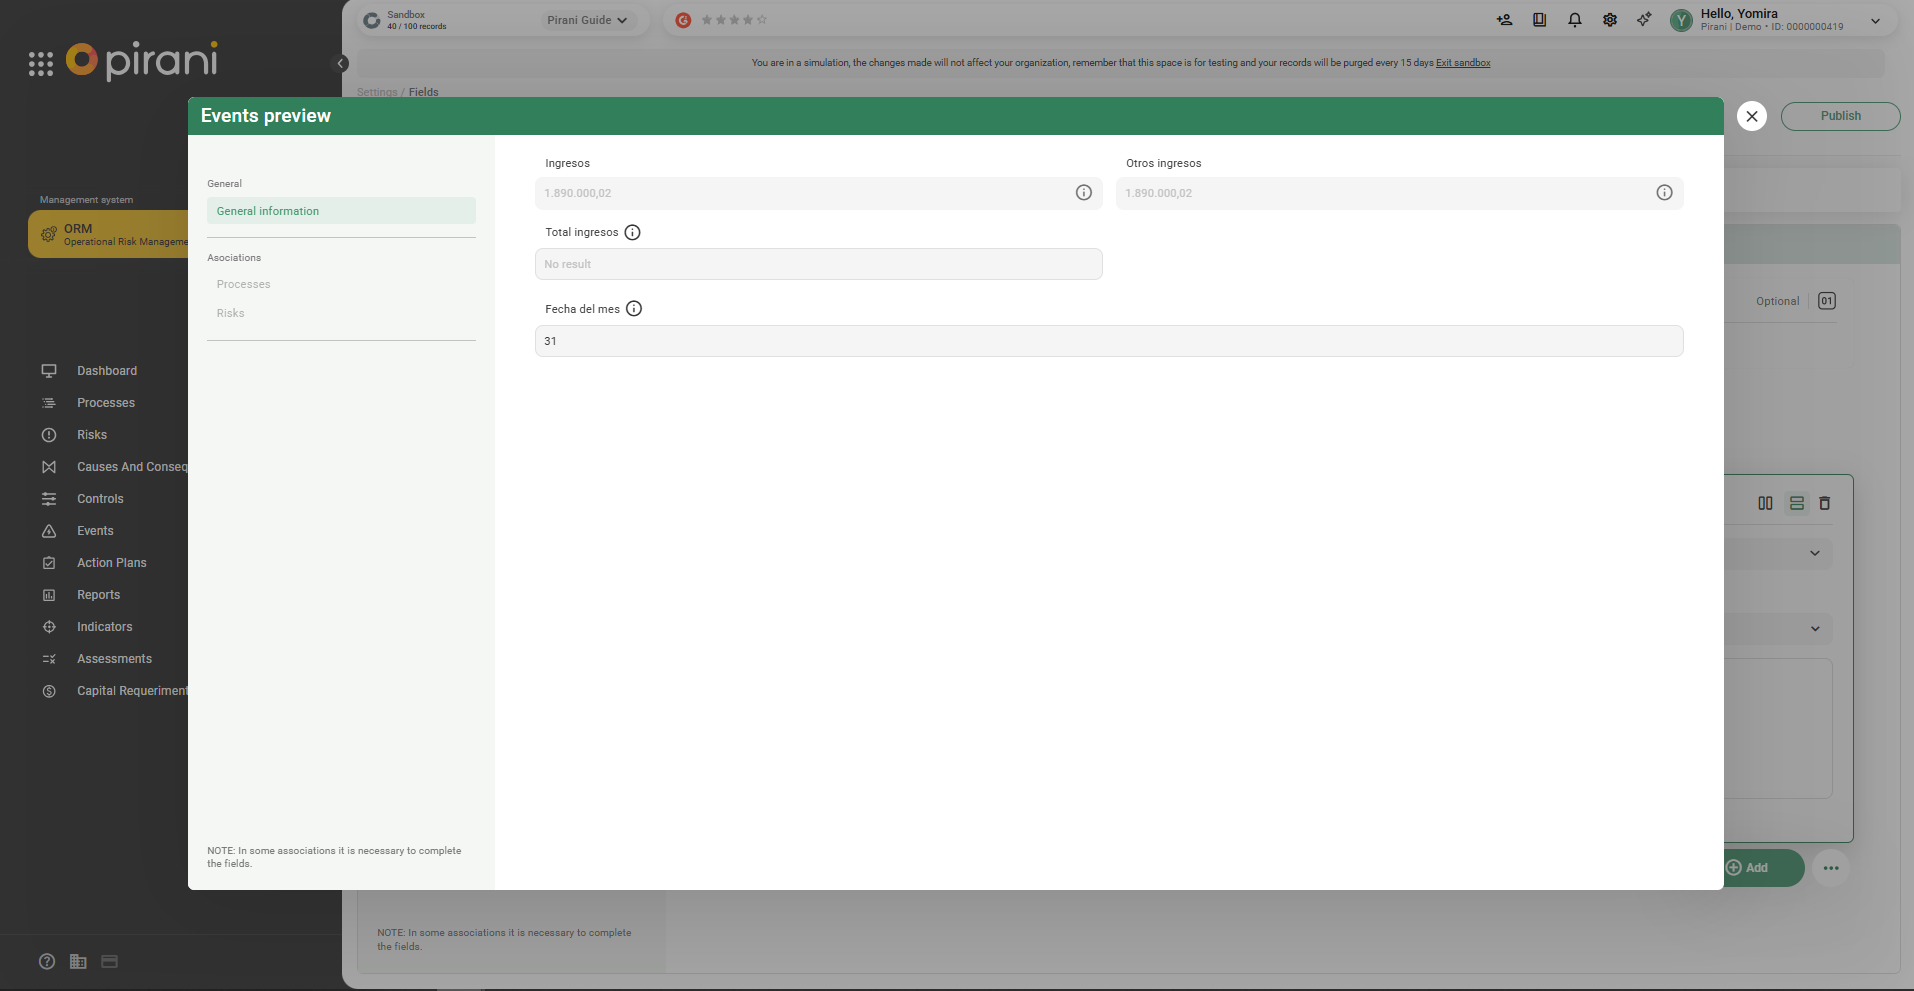
Step 5: Then you can preview the formula by selecting the Simulate tab.
It will show the fields you added and the simulation result.

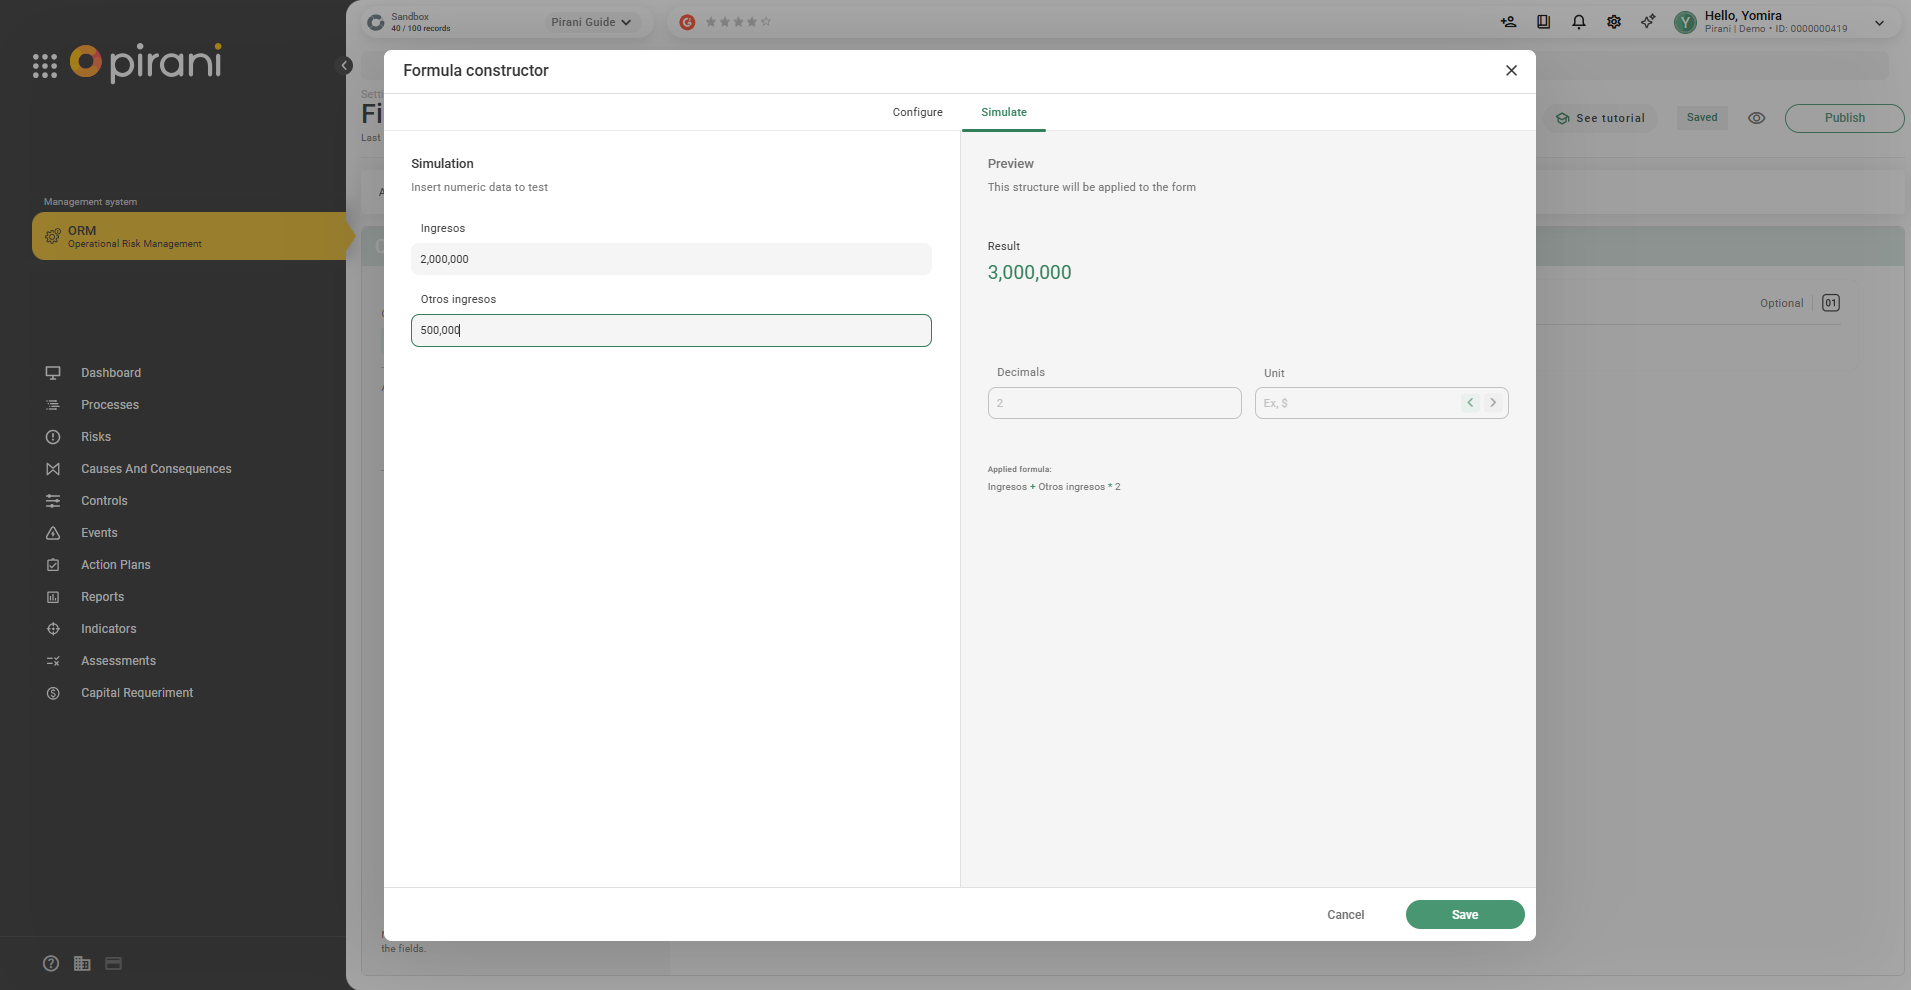
You can also define the structure if your values have decimals by setting the number of decimal places you want.

It can also be displayed with a unit depending on what you define, and finally, click Save.
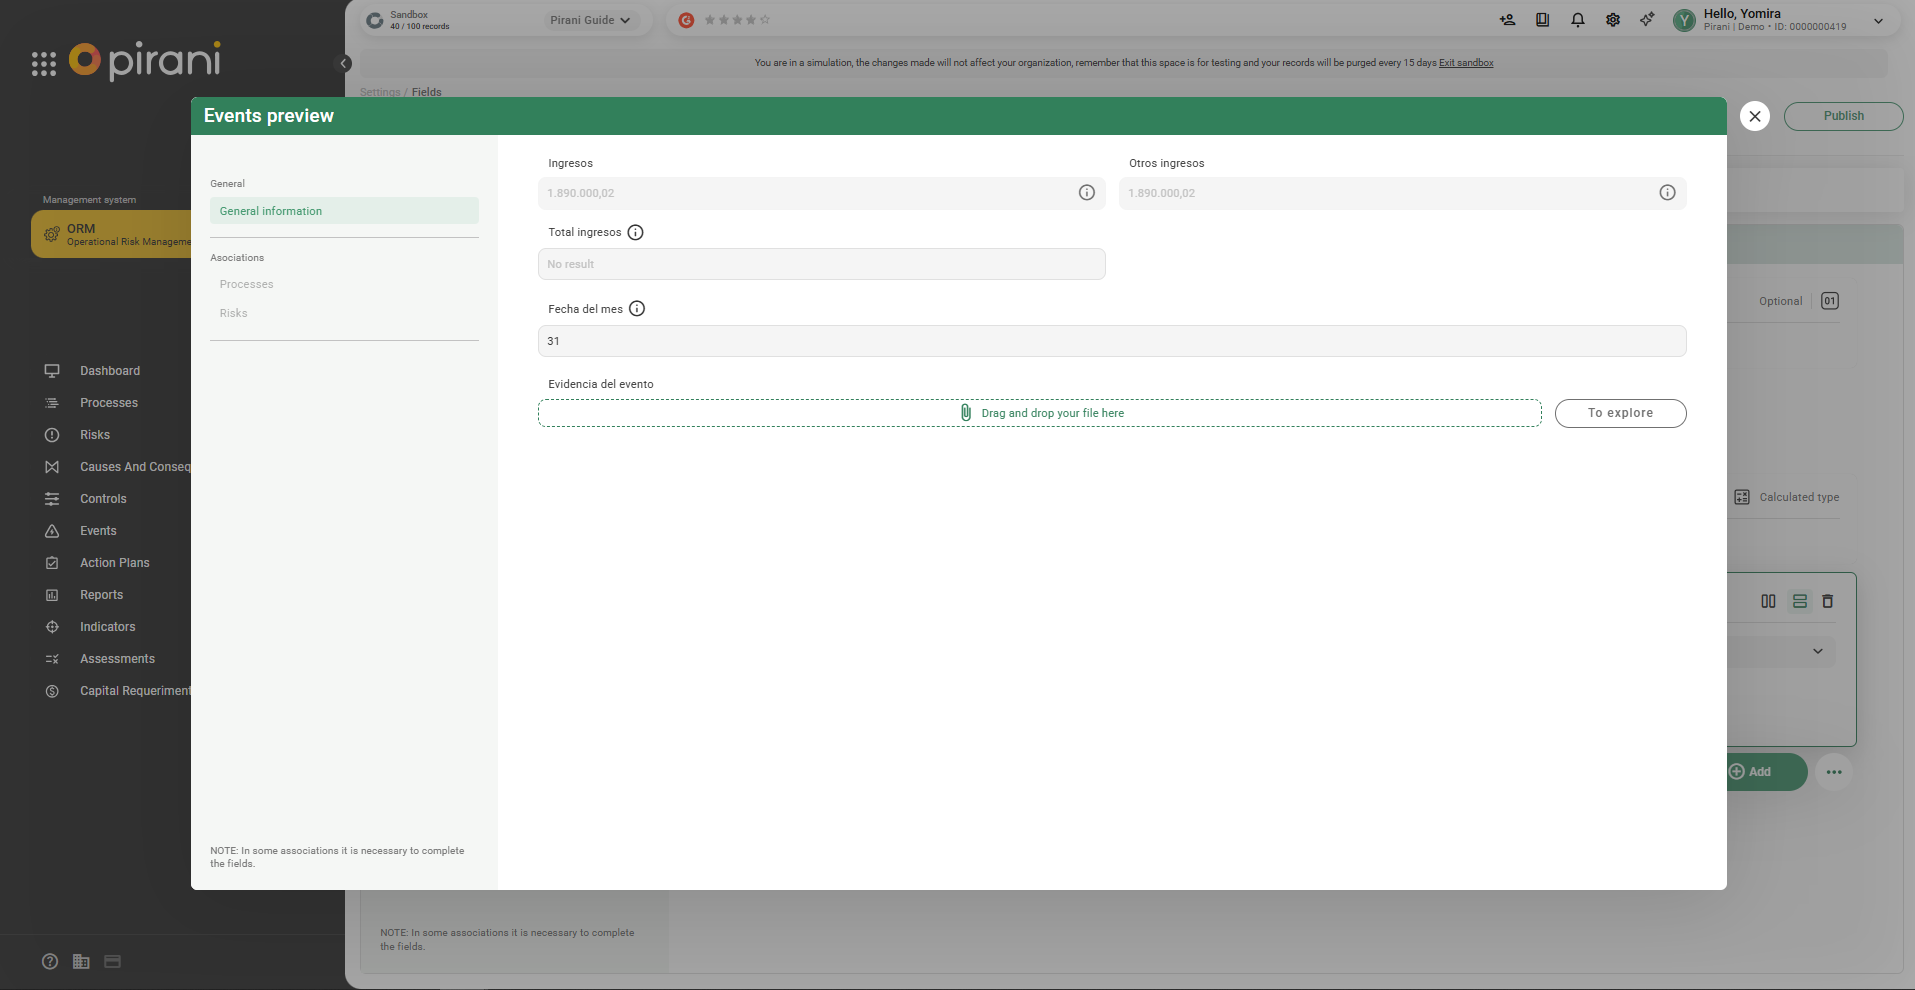
Step 6: Click the Preview icon (👁️)
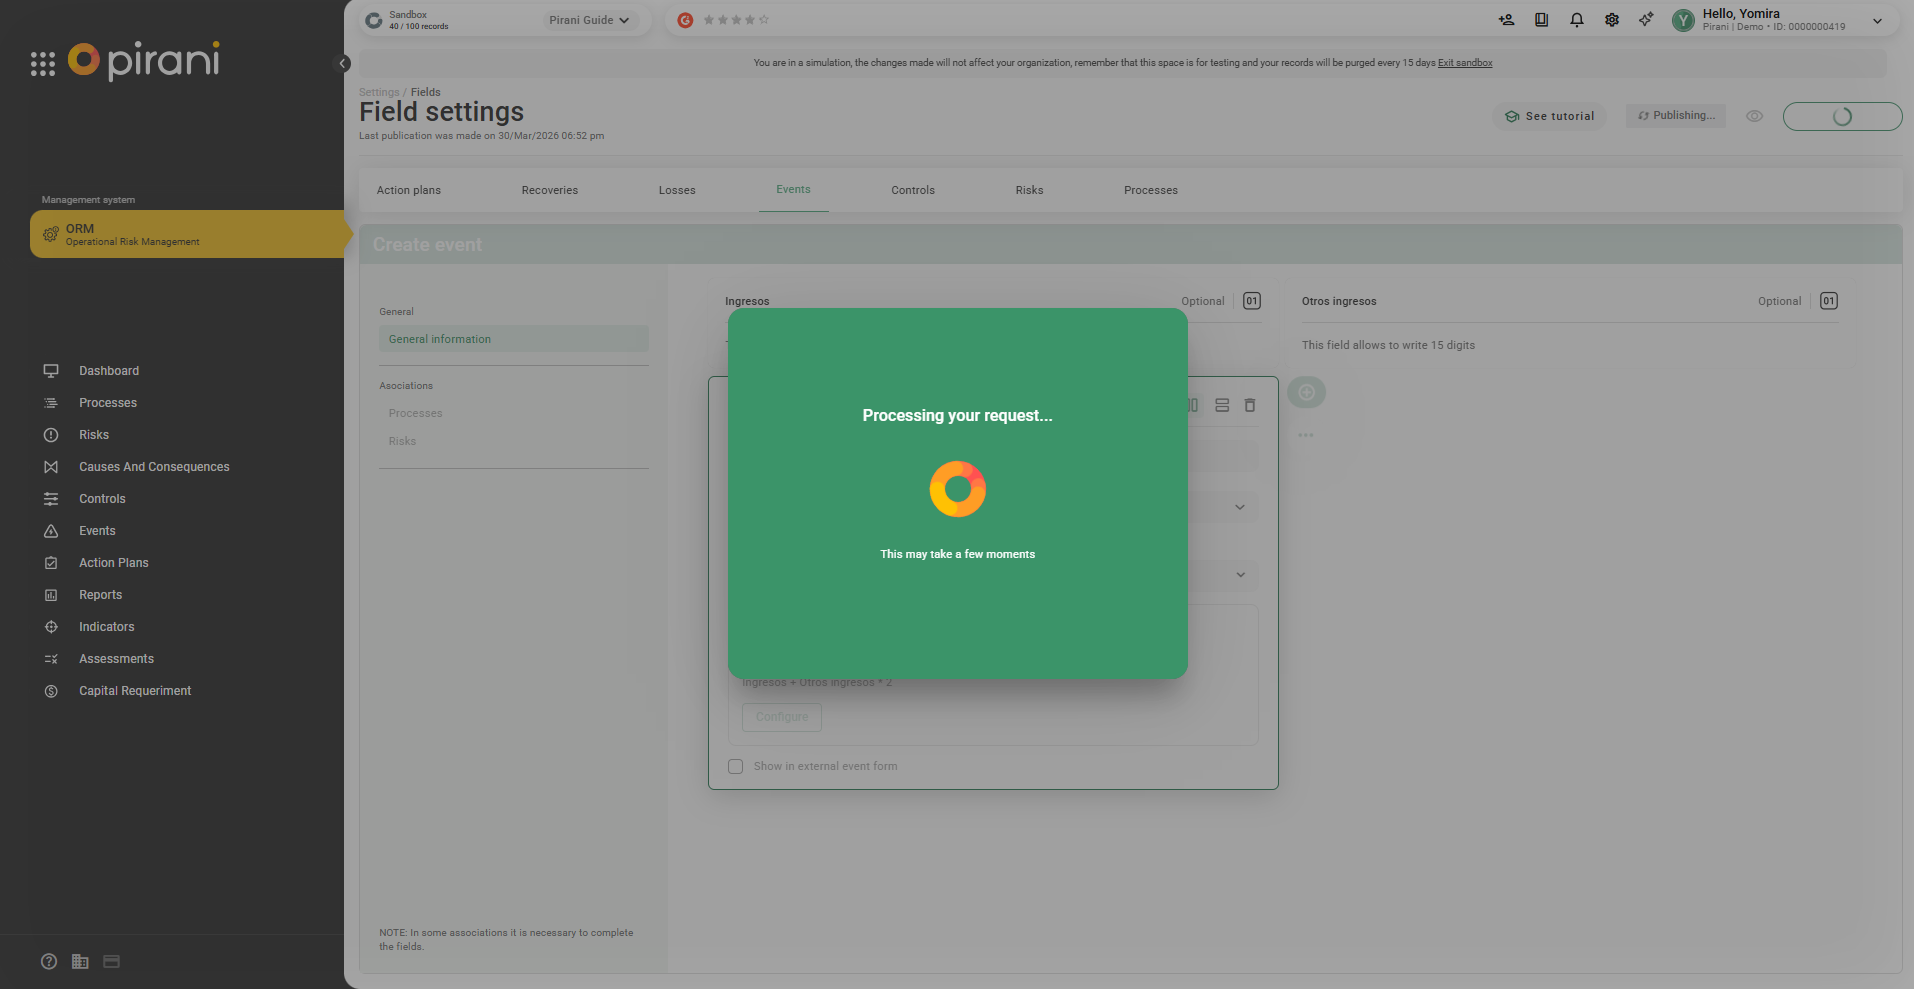
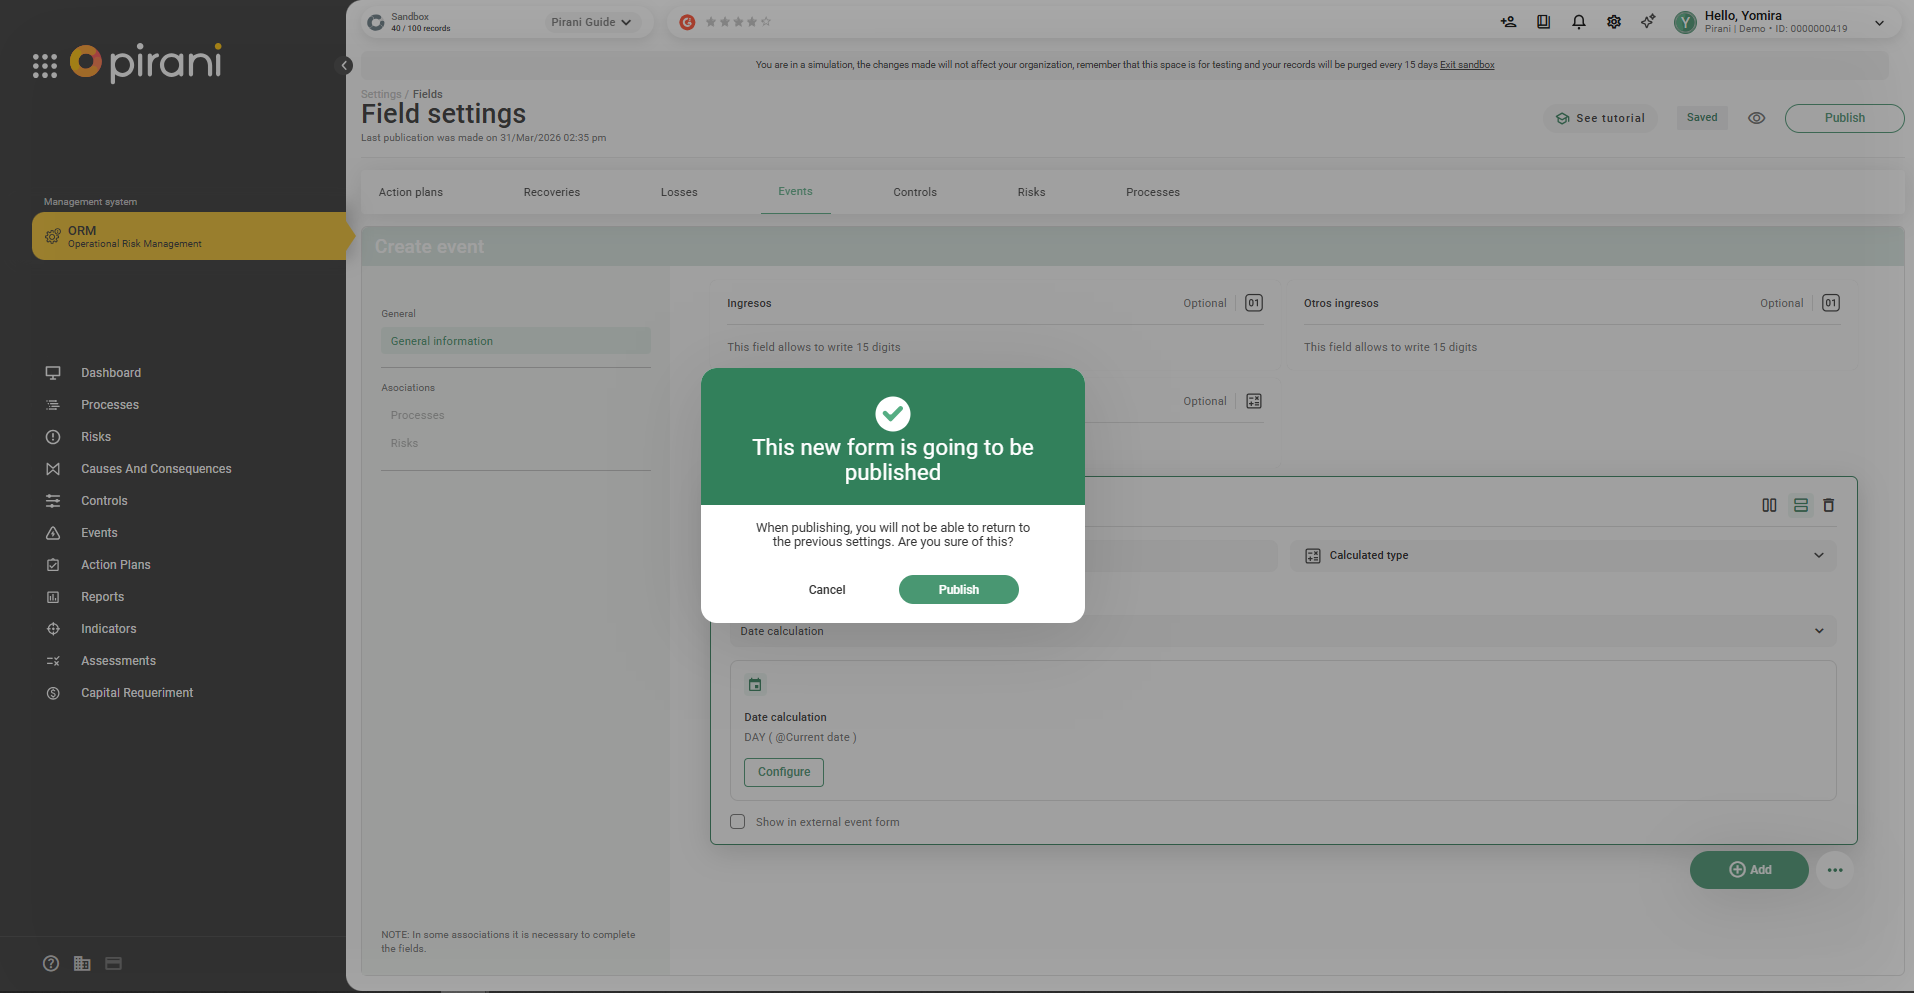
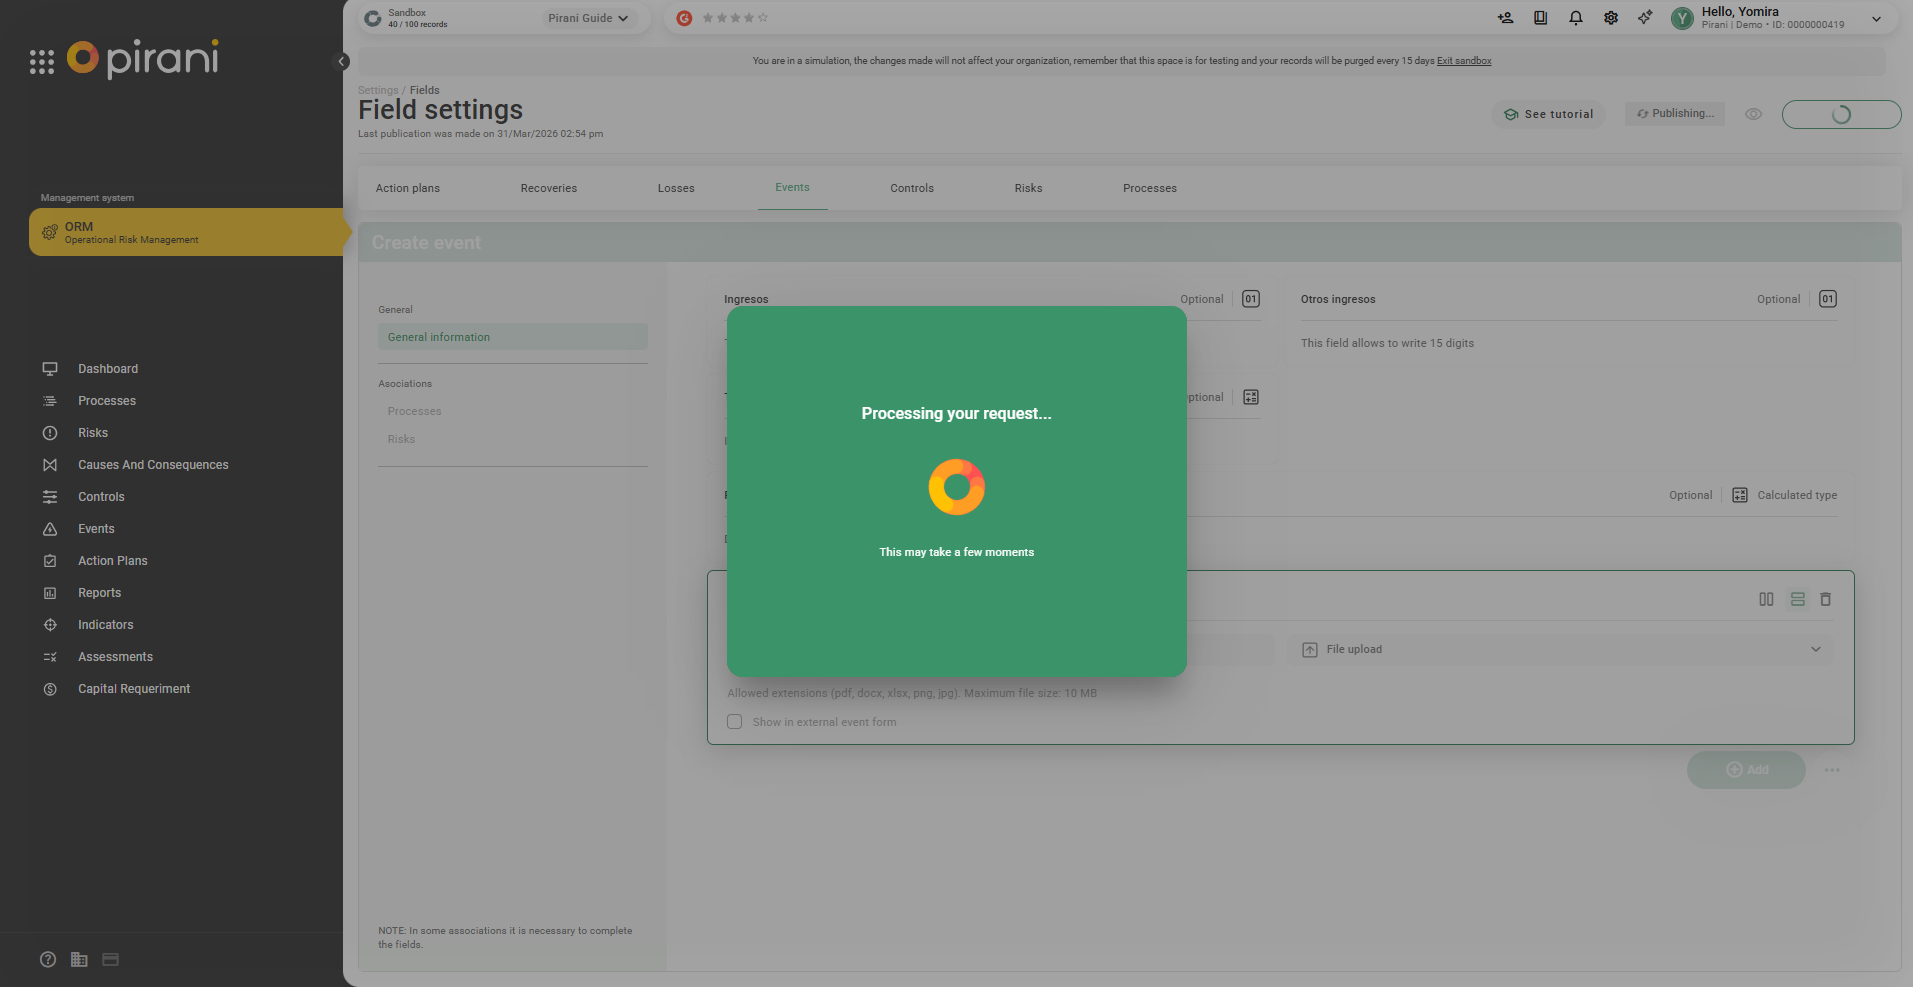
Step 7: Then click Publish so that it appears in the fields.
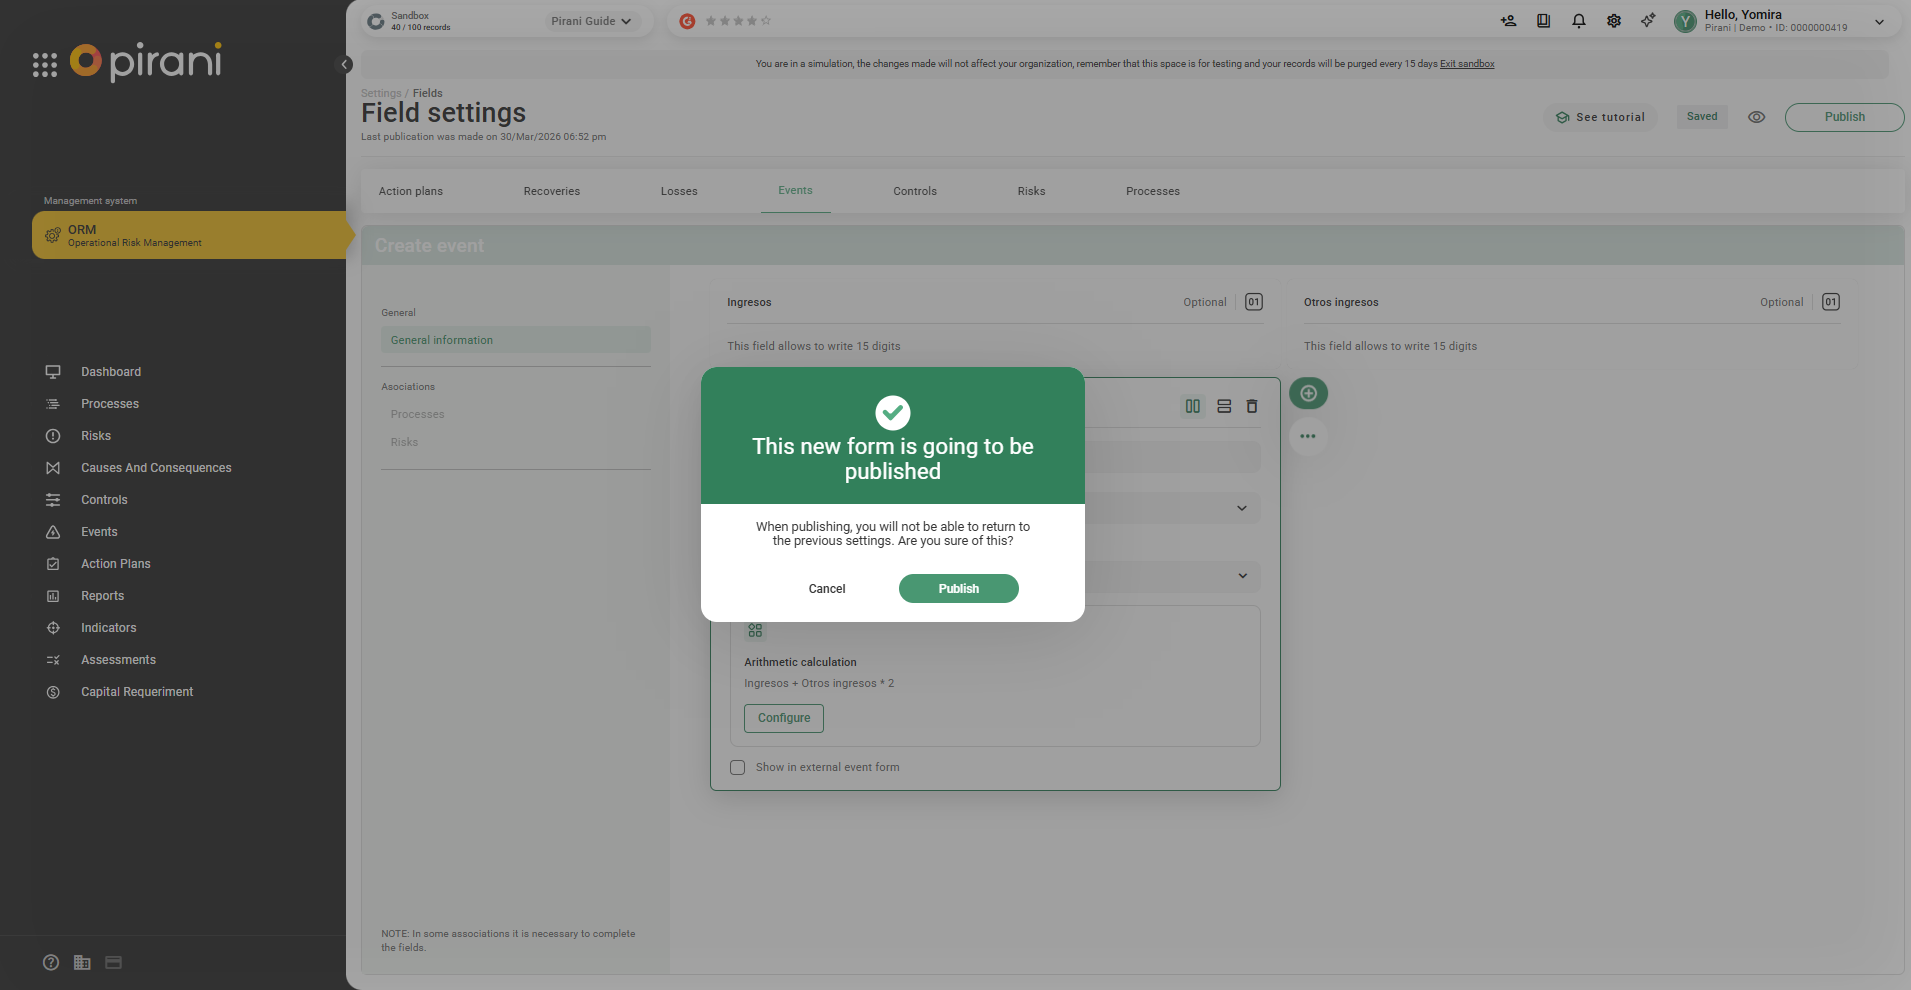
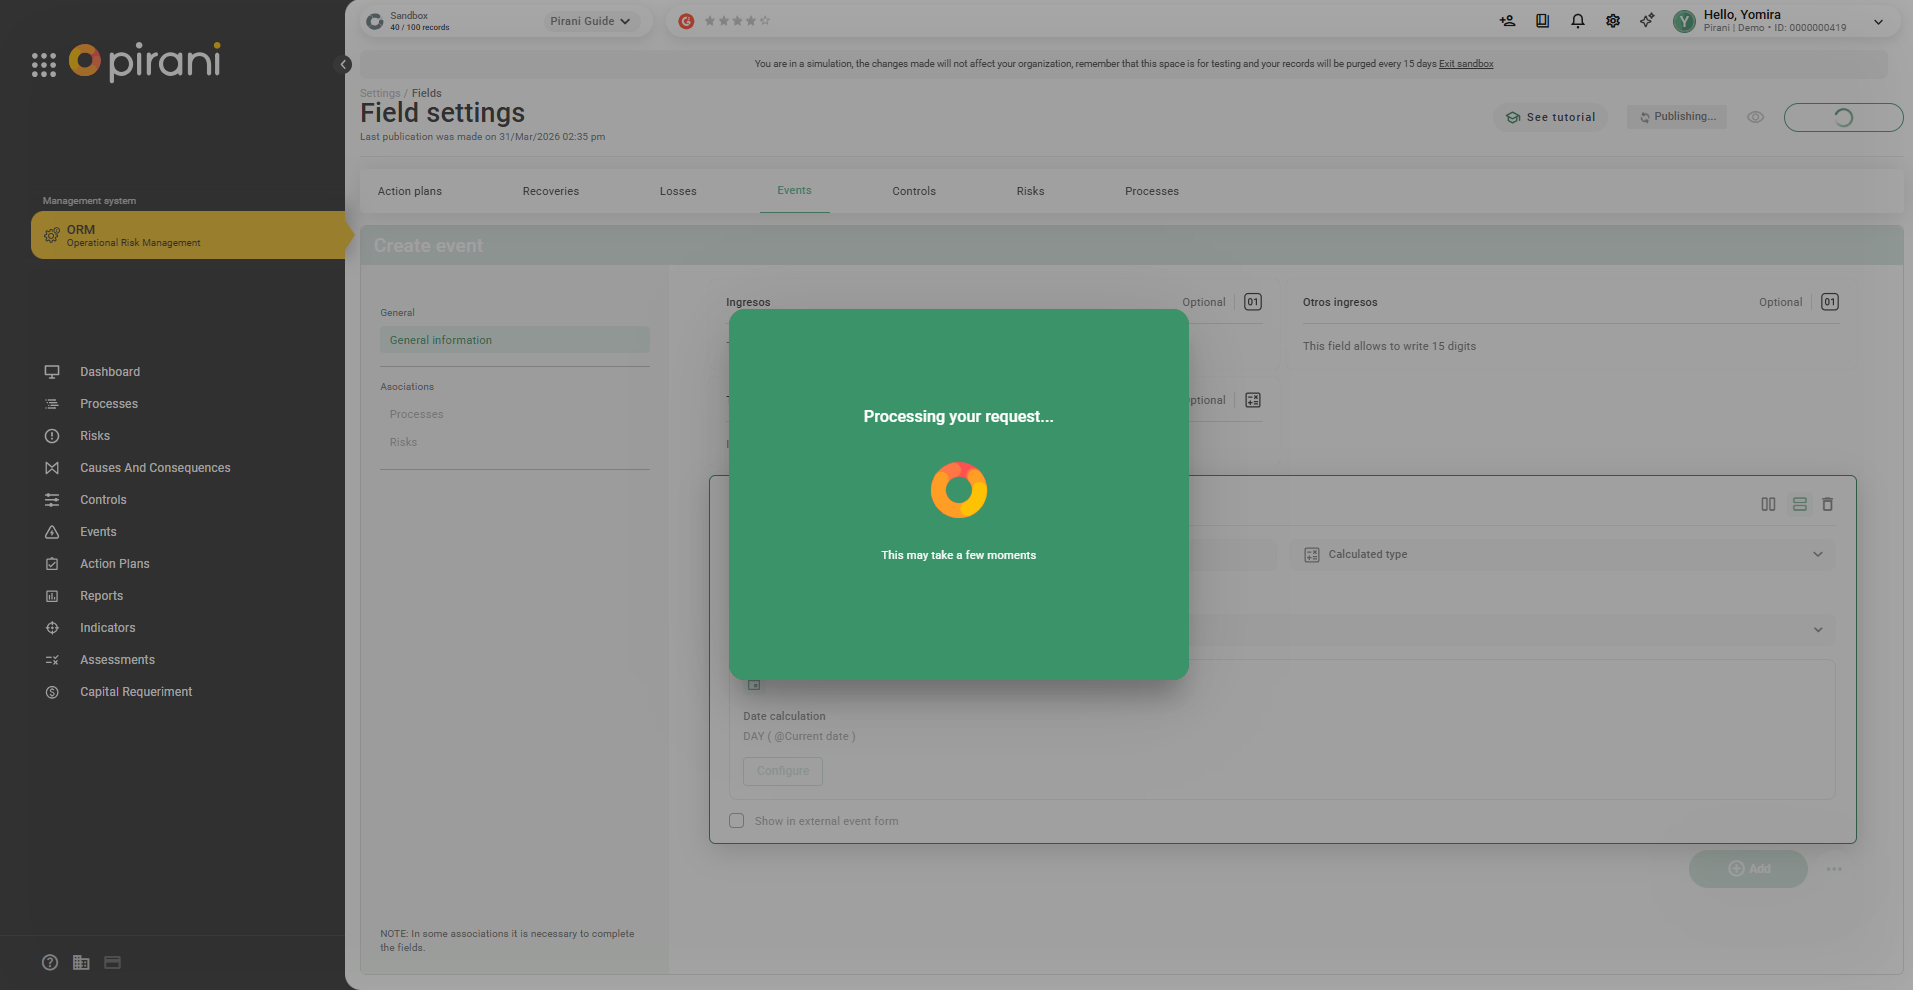
It will take a few seconds for it to be published.
Date calculation
Allows calculating differences or extracting information between dates.
Step 1: Select + Add → Calculated field → Date calculation
Click Configure
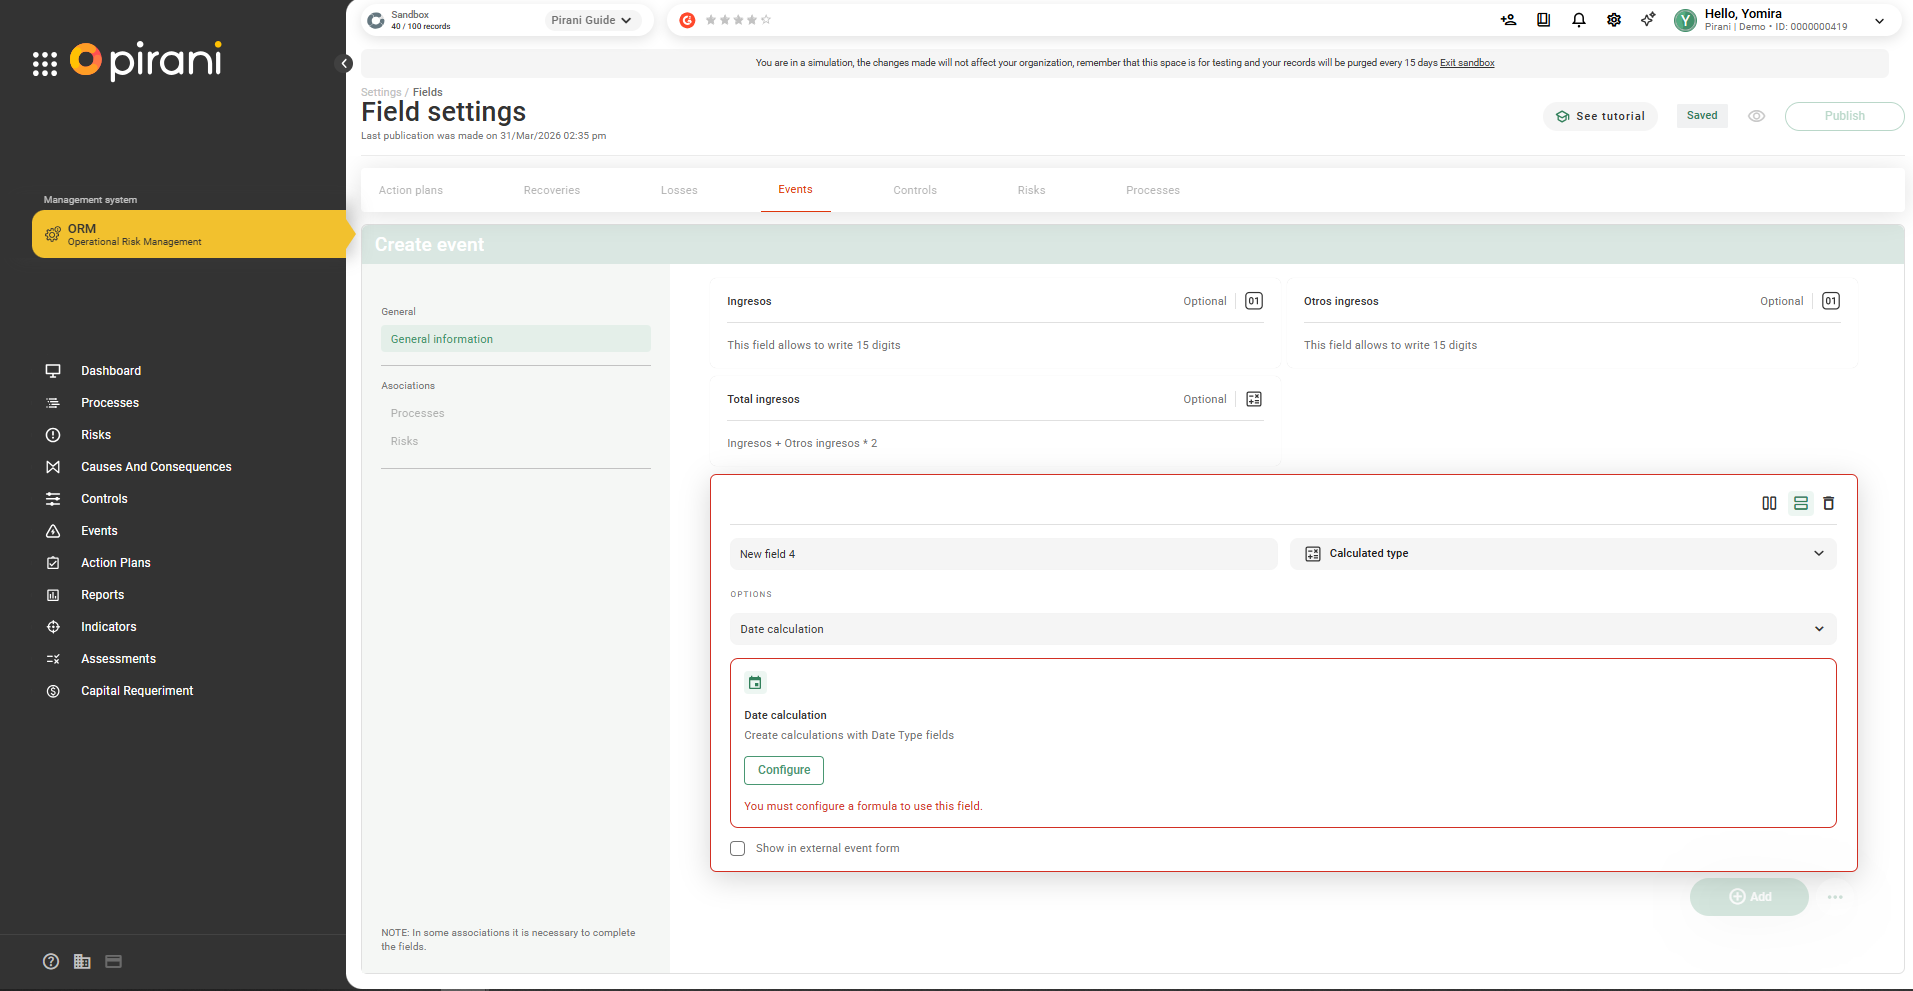
The system will display predefined options.
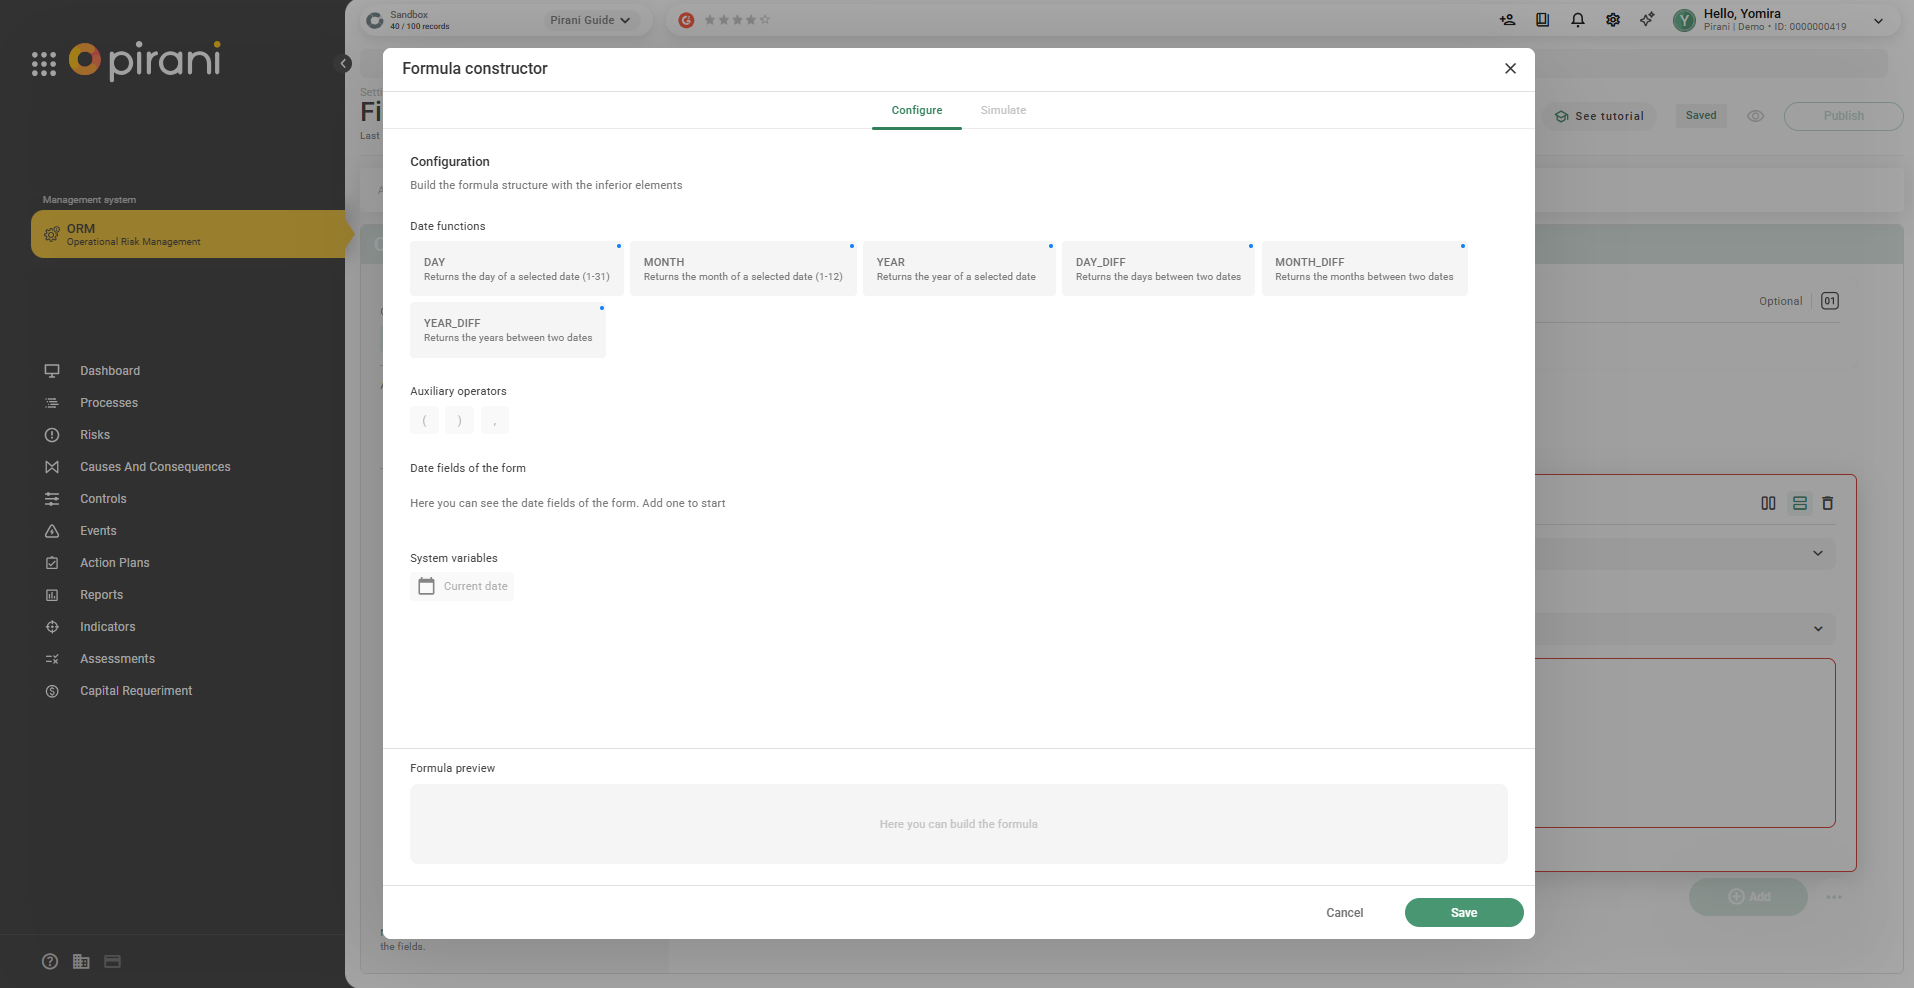
Step 2: Choose the function from the dropdown, then the operator, and select the date-type field.
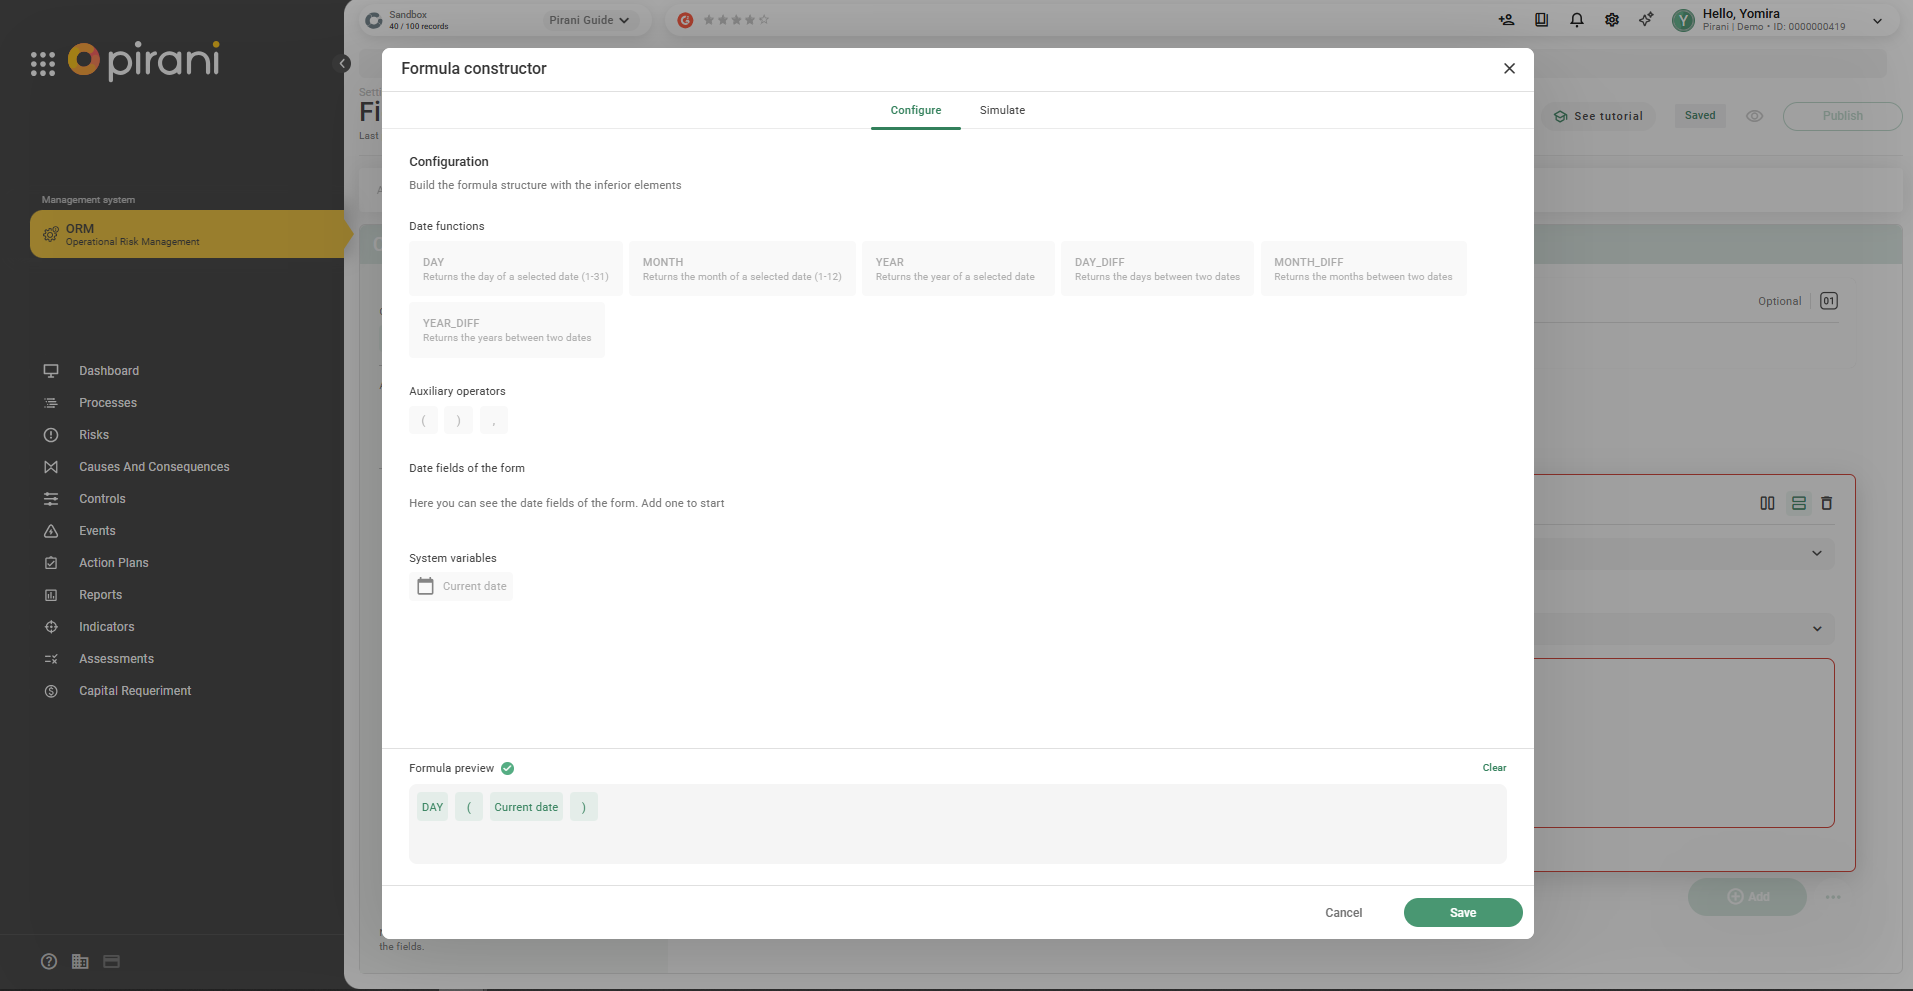
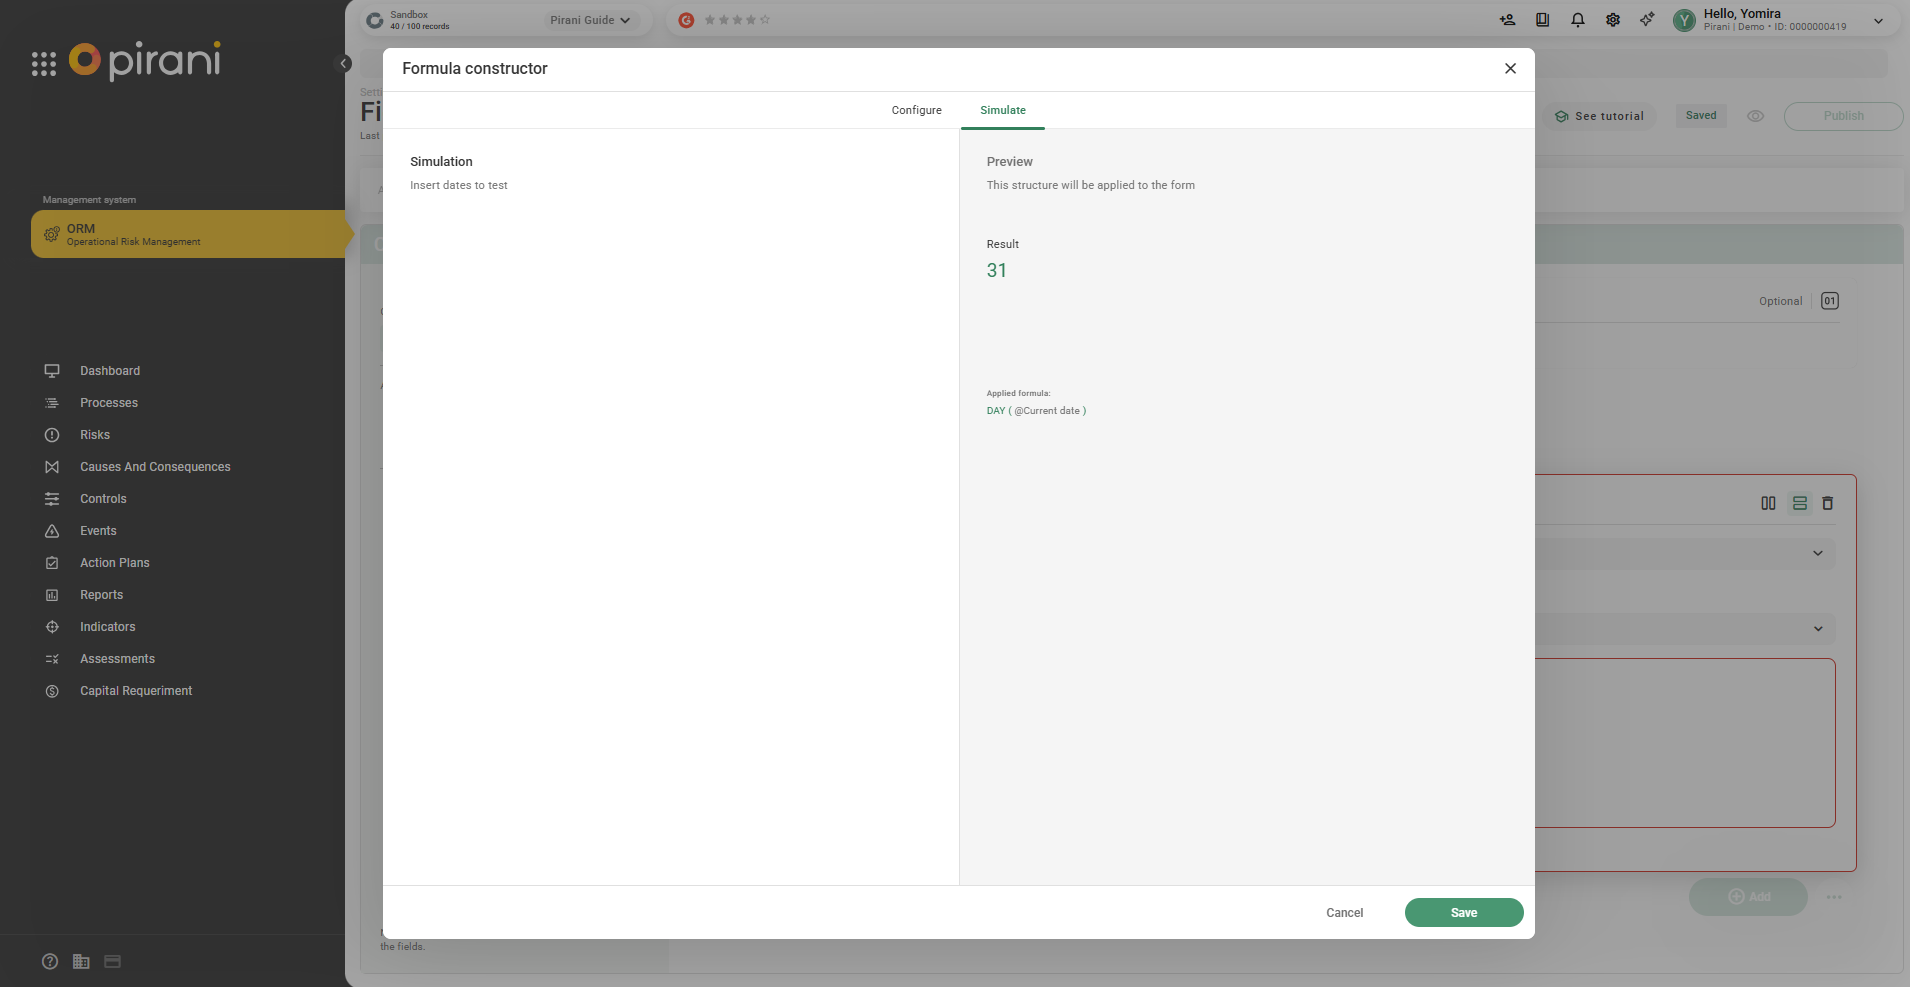
Step 3: Use the Simulate tab to validate the calculation and click Save.
💡 You can use the Clear option to create a new formula.
Step 4: Click the Preview icon (👁️)
Step 5: Then click Publish so it appears in the fields.
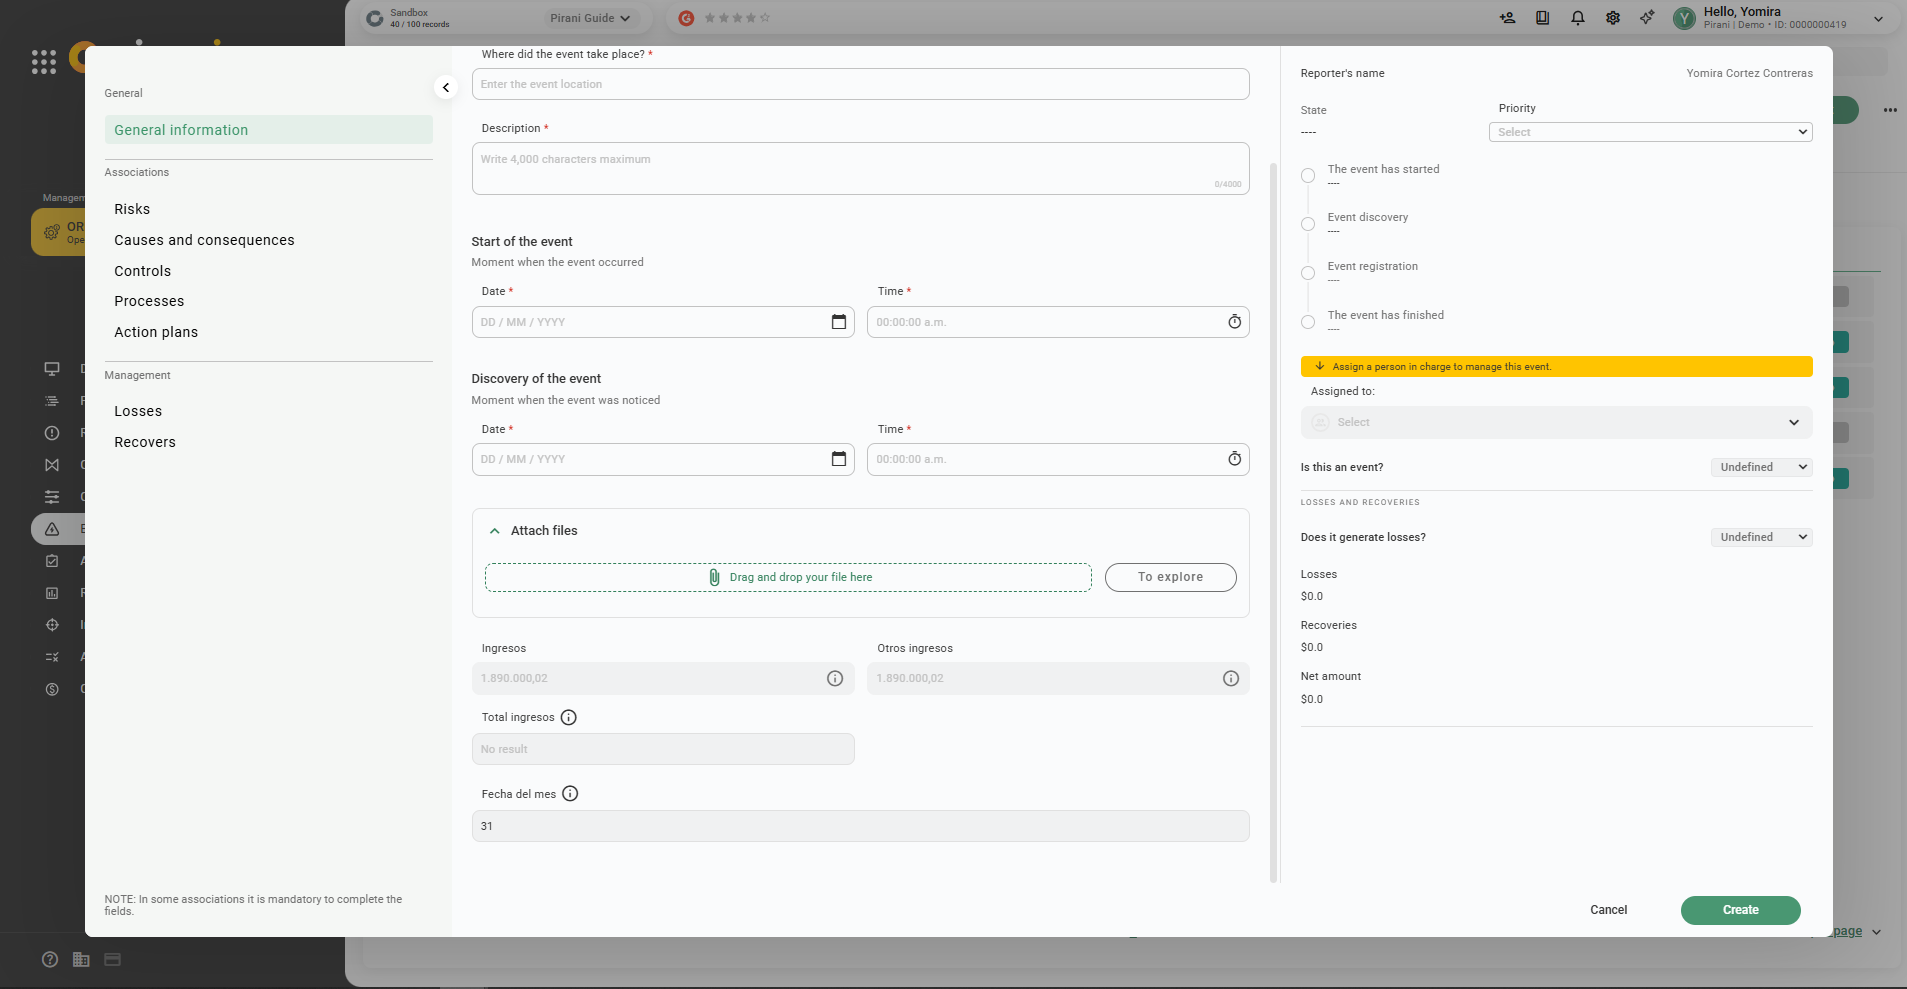
Step 6: Go to the module (e.g., Events) to view the field.
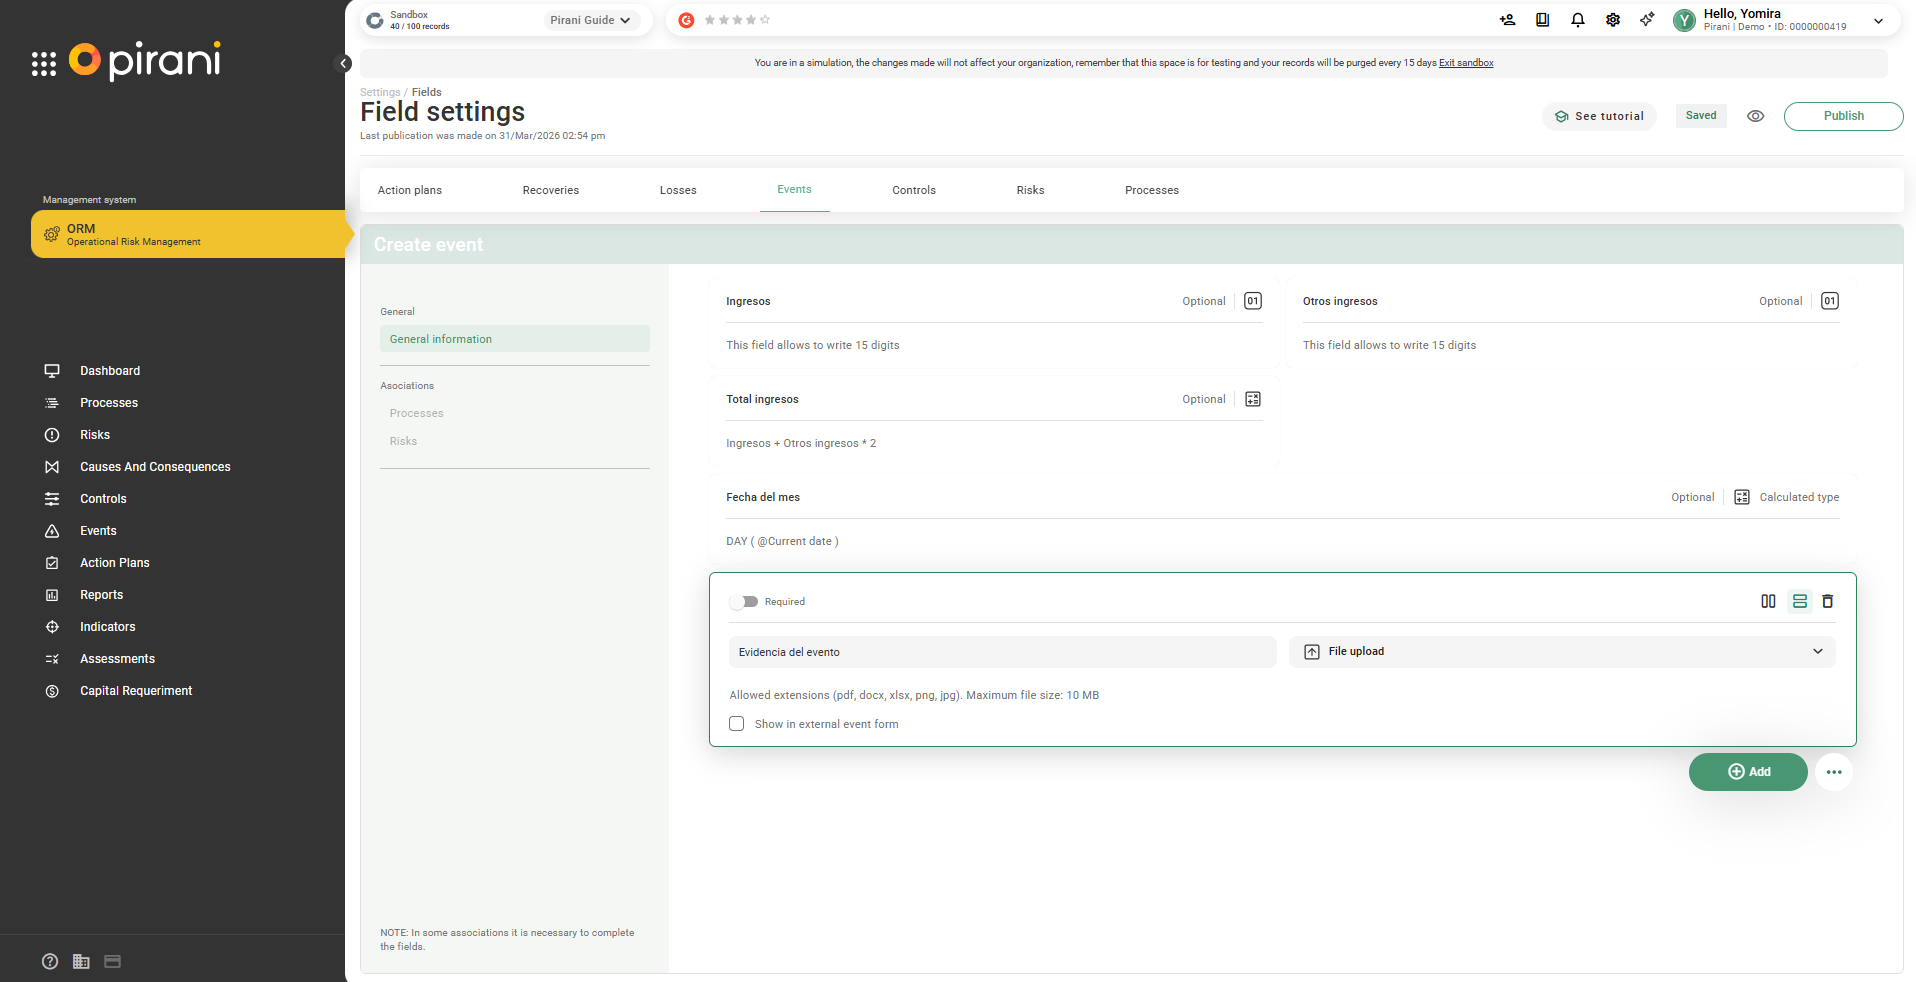
File upload field
Allows attaching files to a record.
Step 1: Assign a name to the field (e.g., Event evidence).
Step 2: Keep in mind only the following file types are allowed:
Maximum size: 10 MB
Allowed formats: pdf, docx, xlsx, png, jpg
Step 3: Click the Preview icon (👁️)
Step 4: Click Publish to save the changes.

It will take a few seconds for it to be published.
Step 5: Go to the corresponding module (e.g., Events) to view the field.
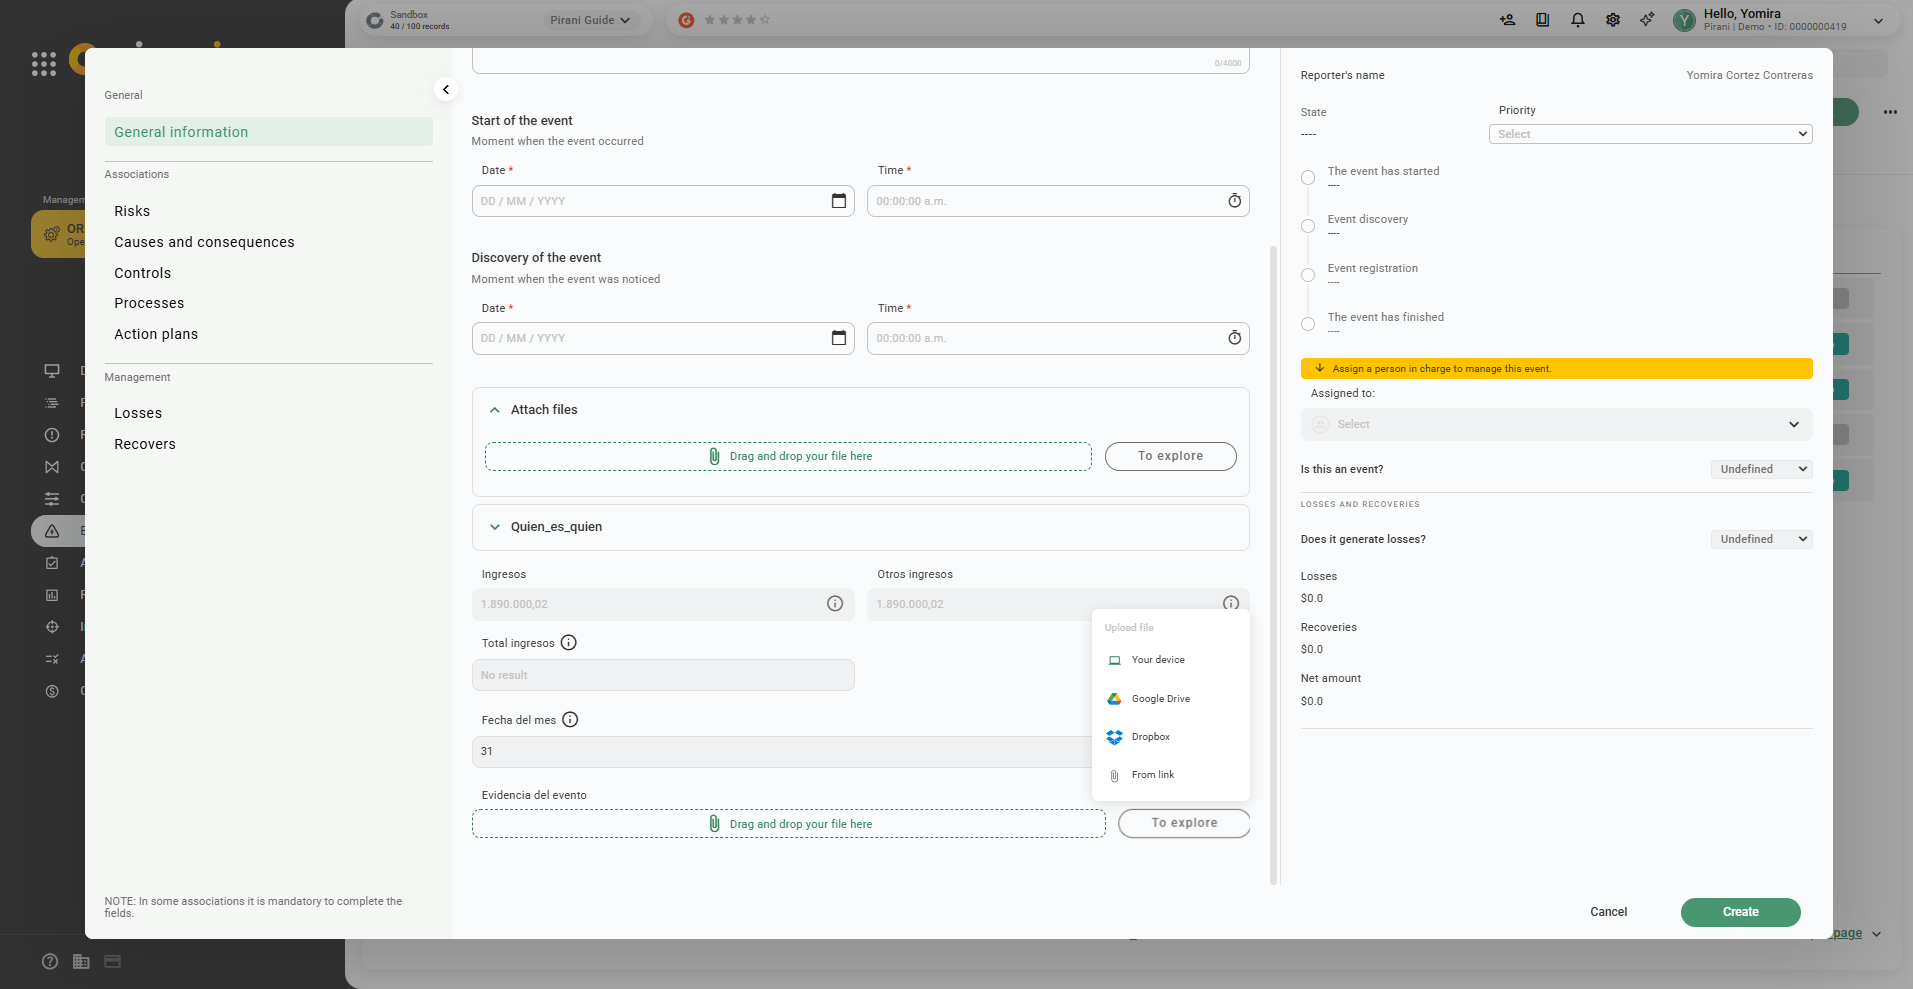
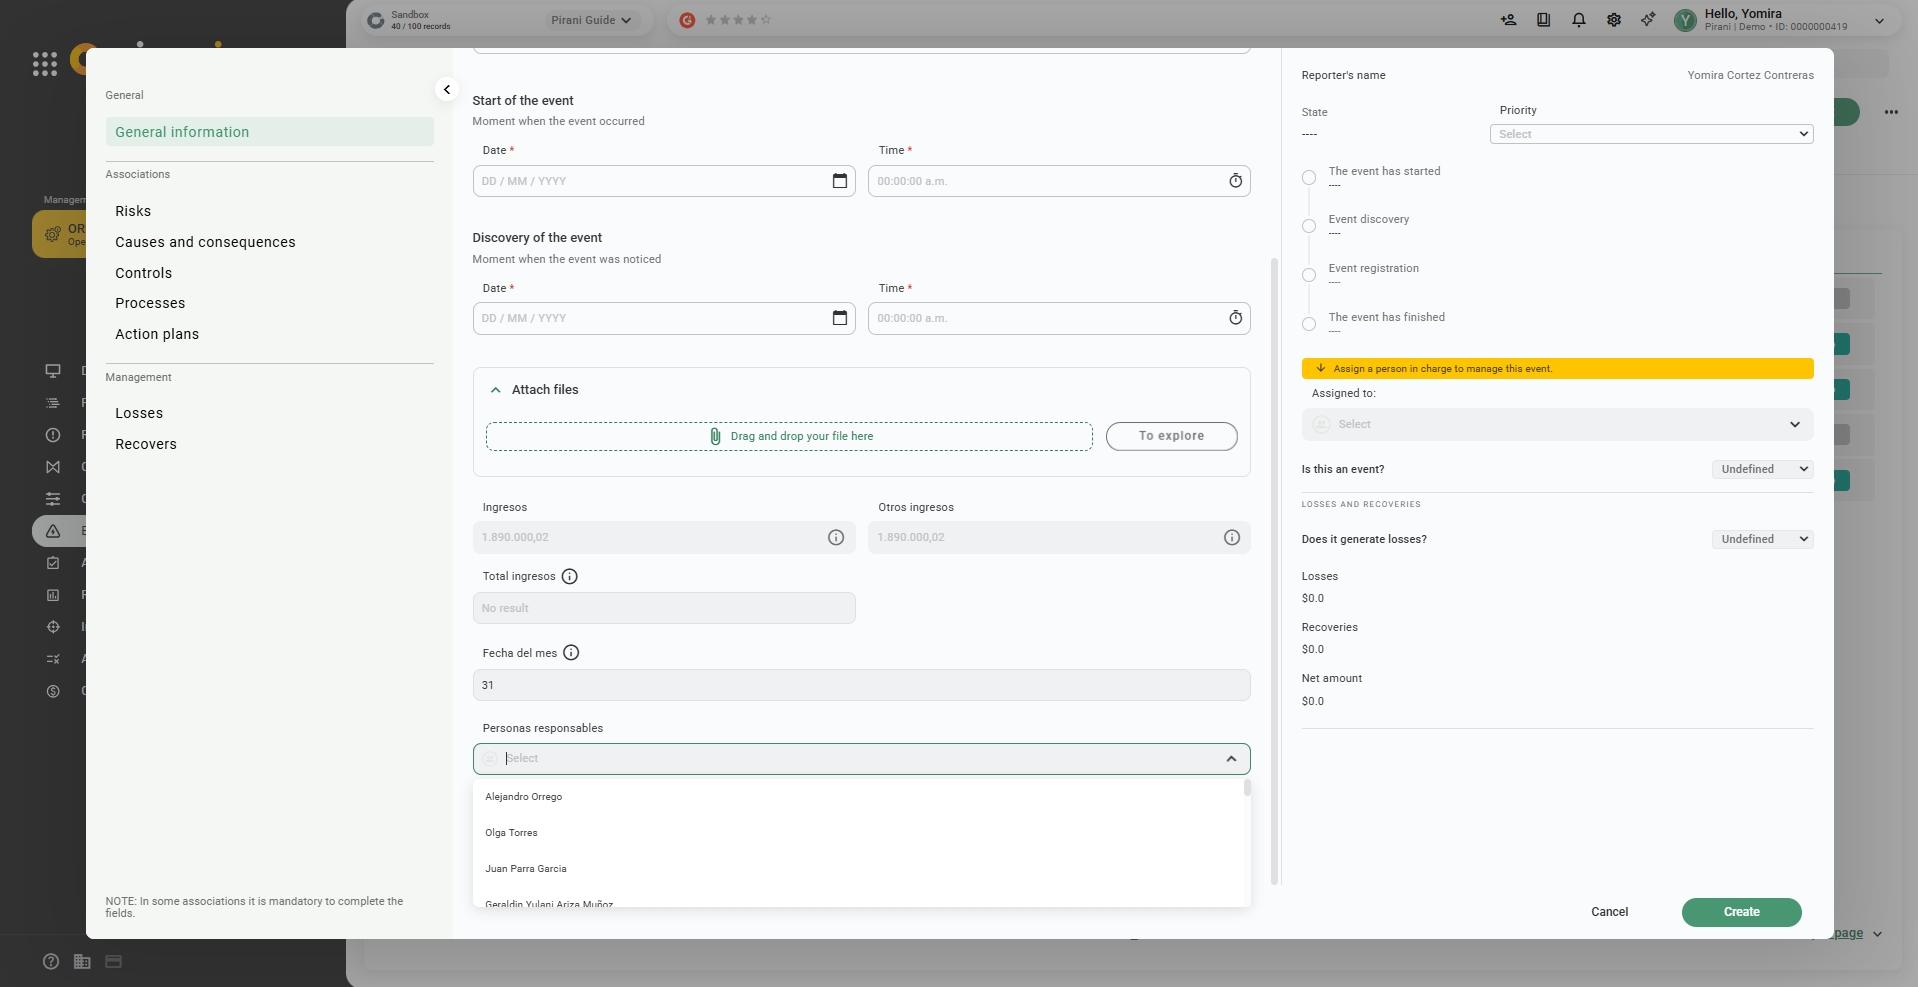
Person type field
Allows selecting individual users or groups within Pirani forms, for example, to assign responsibility for tasks or events. This field is also available in flows and state transitions, appearing in the corresponding configuration options.
Step 1: Select Person type

Step 2: Define the field name (e.g., Responsible persons)

Step 3: You can select either one or both options:
- Person list
- Group list
Step 4: Click the Preview icon (👁️)
Step 5: Click Publish to save both changes.
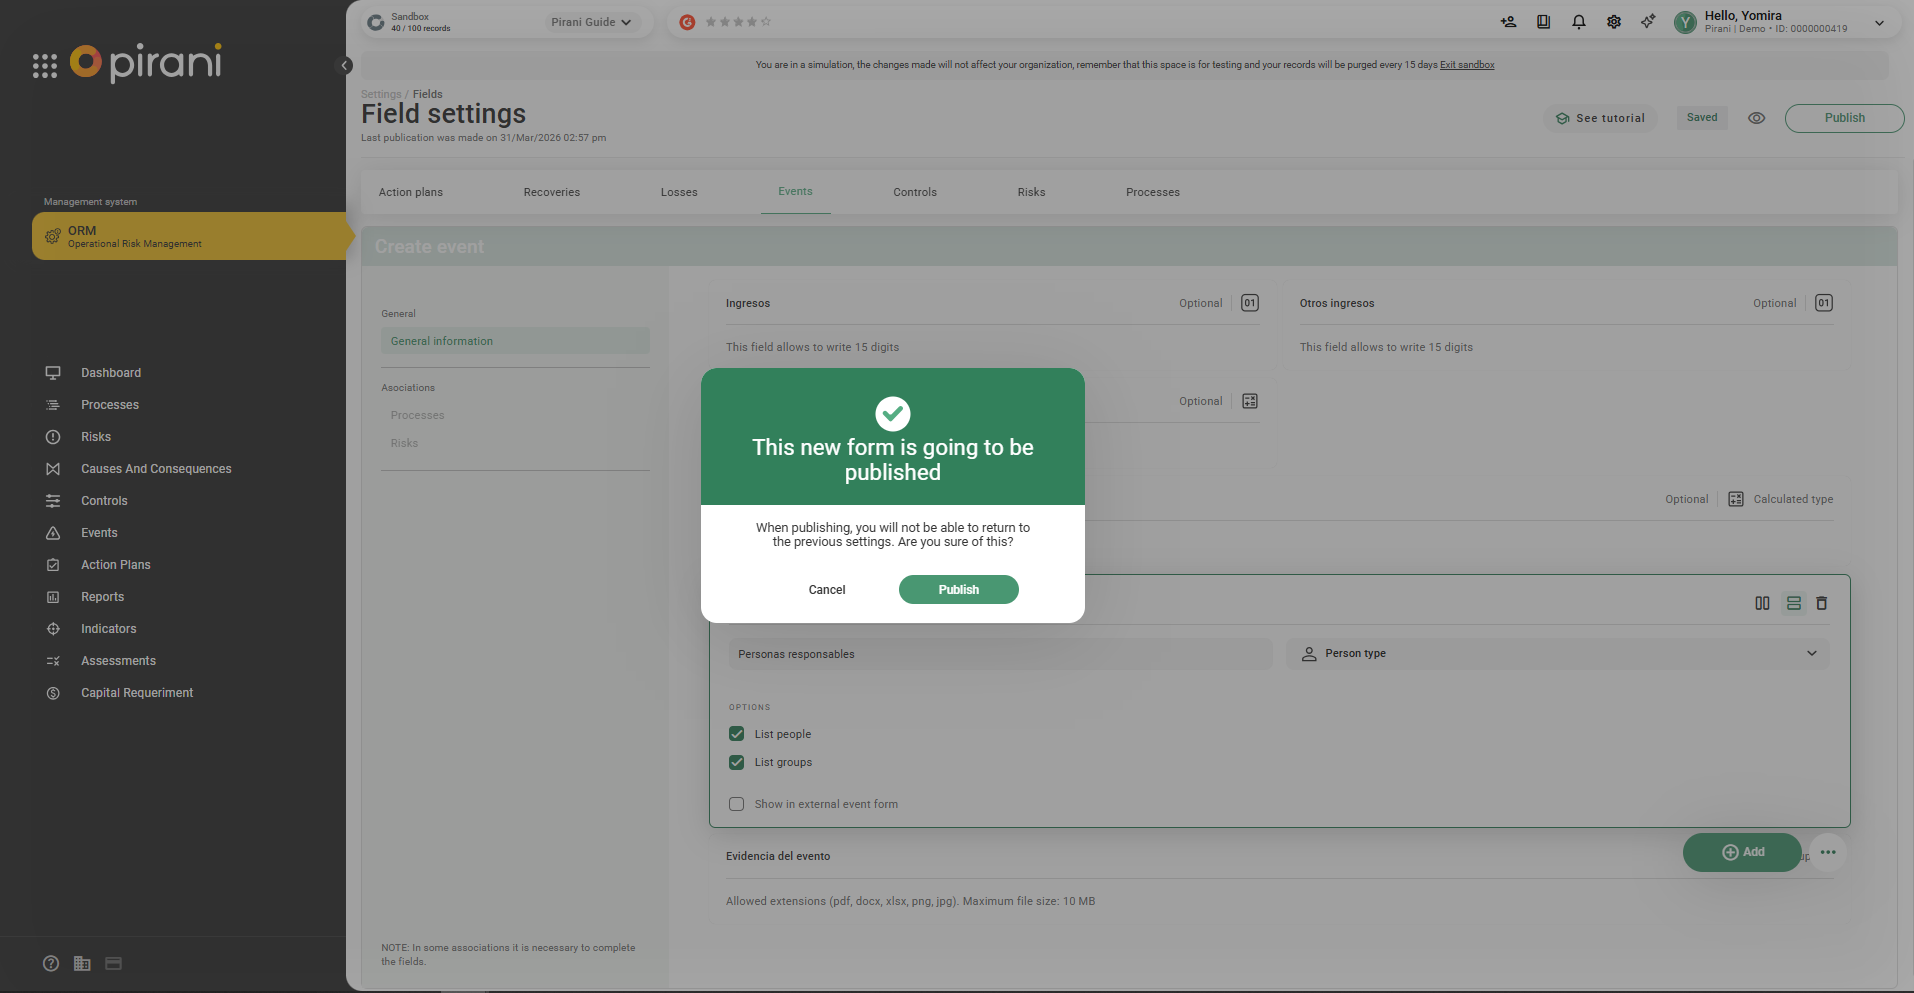
It will take a few seconds for it to be published.

Step 6: Go to the corresponding module (in this case, Events) to view the assigned field.
A list of groups and users will be displayed, from which you can select the ones you need.